Finish and inspection of installed door and window frames are critical stages in carpentry and joinery that determine the durability, functionality, and aesthetic appeal of the final product. In Kenya’s construction sector, where climatic conditions and user expectations vary widely, proper finishing safeguards the frame against environmental damage and enhances its lifespan. This chapter covers essential techniques for surface preparation and the application of protective and decorative finishes, equipping carpentry professionals with skills to deliver superior quality installations.
4.1 Surface Preparation
Surface preparation ensures that the installed door and window frames are ready to receive finishes that will adhere properly and provide long-lasting protection. In Kenya, variations in materials and site conditions require carpenters to adapt preparation methods carefully to achieve smooth, defect-free surfaces. This process involves removing unwanted residues, smoothing rough areas, and filling imperfections to create a flawless base for finishing.
4.1.1 Remove excess adhesives, sealants, and debris. Sand rough edges and surfaces for a smooth finish.
Removing excess adhesives, sealants, and debris from installed frames is essential to prevent finish defects and ensure a clean, professional appearance. Adhesives and sealants used during installation can leave residues that interfere with paint or varnish adhesion, leading to peeling or uneven surfaces. Debris such as wood shavings, dust, and dirt can also mar the finish and cause premature wear. Once the frame is clean, sanding smooths out irregularities, sharp edges, and surface imperfections; proper sanding improves finish adhesion and enhances the tactile and visual quality of the frame. In Kenyan carpentry, where timber species vary from softwoods like pine to hardwoods like mahogany, sanding techniques must be adapted accordingly. Example: before varnishing the mahogany door frames of a boarding school's new dormitory, the carpenters scraped off dried glue, wiped away silicone smears and sanded every frame from 80 to 180 grit.
Identifying Residues and Debris
- Adhesive Residues: Often visible as sticky patches or hardened spots along joints or surfaces. These may include wood glue or silicone sealants.
- Sealant Excess: Commonly found where joints have been sealed to prevent water ingress; can form thick, uneven layers.
- Construction Debris: Includes sawdust, wood chips, and dirt accumulated during installation or transport.
- Dust Particles: Fine dust from sanding or cutting that settles on the frame surface.
- Grease or Oil Stains: Occasionally present from handling or machinery contact during installation.
Methods for Removal
- Scraping: Use a plastic scraper or putty knife to gently remove hardened adhesive without damaging wood.
- Solvent Cleaning: Apply appropriate solvents such as mineral spirits to dissolve sealant residues, ensuring ventilation and safety.
- Vacuuming: Employ a vacuum cleaner with a brush attachment to remove loose dust and debris.
- Wiping: Use clean, lint-free cloths dampened with water or mild detergent to clean remaining dirt.
- Compressed Air: Blow out dust from tight corners and joints where cloth or brushes cannot reach.
Timing of Removal
- Before curing: Remove excess materials promptly after installation before they cure fully for easier cleaning.
- Before sanding: Remove adhesive and sealant before sanding, because sanding spreads soft residue into the wood fibres.
- After other trades: Clean frames again after plasterers and painters have worked nearby, as their splashes stick to new timber.
- Before filling: Clean gaps and holes immediately before they are filled so the filler bonds.
- Before finishing: Perform final cleaning immediately before applying finishes to avoid contamination.
Selecting Sandpaper Grits
- Extra Coarse Grit (40): Used only for heavy levelling of very rough or badly marked timber.
- Coarse Grit (60-80): Used for initial removal of roughness, glue spots, and uneven surfaces.
- Medium Grit (100-120): For smoothing surfaces after coarse sanding and preparing for final finish.
- Fine Grit (150-220): Applied before finishing to achieve a smooth, polished surface.
- Very Fine Grit (240-320): Used on close-grained hardwoods that will receive a clear finish, where every scratch shows.
Sanding Techniques
- Hand Sanding: Employ sanding blocks for better control on flat surfaces and edges.
- Orbital Sanders: Use electric sanders for larger areas to save time and ensure uniformity.
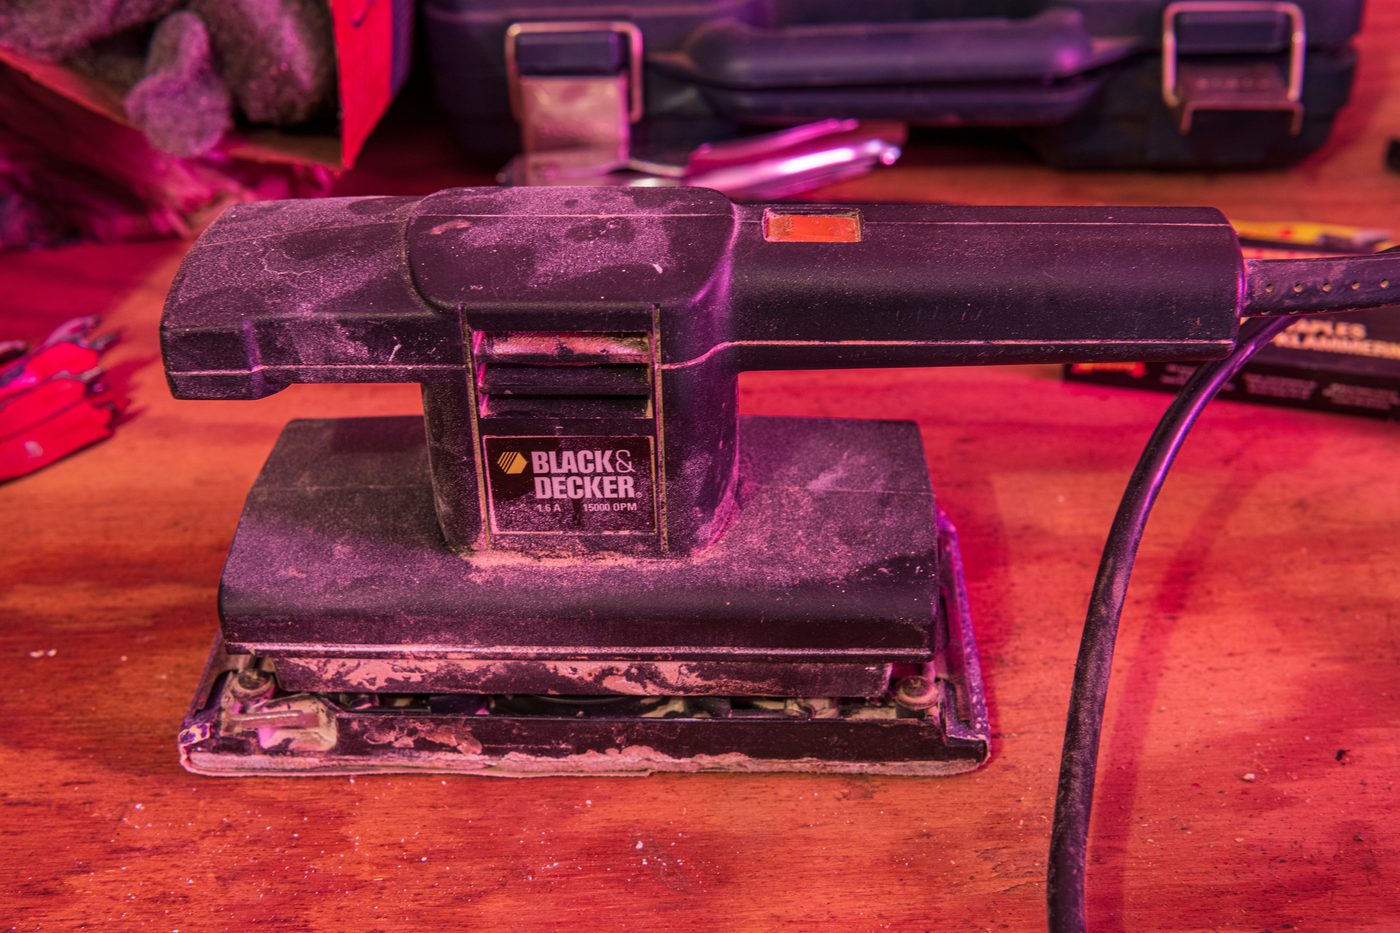
Black & Decker orbital sander on workbench (Source: Wikimedia Commons)
- Edge Sanding: Carefully sand corners and joints to remove splinters and sharp edges without rounding them excessively.
- Directional Sanding: Sand along the wood grain to prevent scratches that are visible after finishing.
- Dust Removal: After sanding, remove all dust using brushes or vacuum to prevent finish defects.
Safety Considerations
- Dust masks: Wear dust masks to avoid inhaling fine wood particles.
- Eye protection: Use eye protection to safeguard against flying debris during power sanding.
- Ventilation: Work with windows open or use dust extraction when sanding indoors.
- Solvent safety: Keep solvents away from flames and wear gloves when using them.
- Electrical safety: Check power sander cables and plugs for damage before use.
4.1.2 Fill gaps or holes using appropriate fillers
Filling gaps, holes, and cracks is necessary to restore the surface integrity of door and window frames before finishing. This step prevents moisture ingress and provides a uniform surface that enhances both appearance and durability. In Kenya, where timber sometimes contains natural defects or installation may leave gaps, selecting and applying the right filler is critical. Example: at a lakeside lodge in Naivasha, nail holes in the cypress window frames were filled with a stainable wood filler matched to the timber colour, while a split in one frame head was filled with epoxy.
Types of Fillers
- Wood Filler: Made from wood fibers and binders, suitable for small holes and dents.
- Epoxy Filler: Provides a strong, durable fill for larger cracks or structural gaps.
- Polyester Filler: Fast-curing and sandable, ideal for filling imperfections in hardwood frames.
- Latex-Based Filler: Flexible and paintable, used for minor surface blemishes.
- Putty: Oil-based putty used traditionally for filling nail holes and minor surface defects.
Application Techniques
- Clean the Surface: Remove dust and loose particles from gaps and holes before filling.
- Use a Putty Knife: Apply filler firmly into the defect ensuring complete filling without air pockets.
- Overfill Slightly: Allow for shrinkage by filling slightly above the surface level.
- Allow Curing Time: Follow manufacturer’s instructions for drying before sanding.
- Sand Smooth: After drying, sand the filled areas flush with the surrounding surface.
Considerations for Climate and Finish
- Finish compatibility: Use fillers compatible with the intended finish (paint, varnish, or stain).
- Climate resistance: Choose fillers that can withstand Kenya’s humidity and temperature variations without cracking.
- Colour match: For clear finishes, choose a filler that matches the timber colour, as it will remain visible.
- Movement joints: Use flexible fillers or sealants where the frame meets masonry, because rigid fillers crack as the frame moves.
- Exterior use: Use exterior-grade fillers on frames exposed to rain and sun.
Practice Questions
- Explain why removing excess adhesives and sealants is important before finishing door and window frames. (5 marks)
- Describe the appropriate sanding process for preparing a hardwood window frame for finishing. (6 marks)
- List and explain five types of fillers suitable for repairing gaps in timber frames. (10 marks)
- Outline the steps involved in applying filler to holes in a door frame. (6 marks)
The rest of this chapter
🔒Create a free account to open more of this chapter.
Free: practical guides, quick cards, workplace scenarios and more.
Create a free account 🔒4.2 Protective and Decorative Finishes
Applying protective and decorative finishes to door and window frames not only enhances their appearance but also extends their service life by protecting against moisture, UV radiation, and wear. Selecting the right finish and applying it correctly are vital…
🔒4.3 Inspection
Inspection of installed door and window frames is a critical stage in carpentry and joinery, ensuring that the final product meets functional and aesthetic standards. In the Kenyan context, where construction quality increasingly influences building safety and…
🔒4.4 Adjustments and Corrections
Adjustments and corrections are critical to ensuring door and window frames perform effectively and meet the quality expectations of clients and regulatory bodies in Kenya. Carpentry professionals must identify and rectify issues such as uneven surfaces, misal…
🔒4.5 Cleaning and Maintenance of Installed Frames
In the Kenyan carpentry and joinery industry, the cleaning and maintenance of installed door and window frames are critical for preserving both aesthetic appeal and functional longevity. After installation, frames often retain protective coverings or finishing…
Chapter Summary
This chapter focused on the essential processes involved in finishing and inspecting installed door and window frames. It began with surface preparation, emphasizing the removal of excess adhesives, sealants, and debris, as well as sanding rough edges and filling any gaps or holes to achieve a smooth base. The discussion then moved to protective and decorative finishes, highlighting the selection and even application of paints, varnishes, stains, or sealants to enhance both appearance and durability, along with the importance of adequate drying time and multiple coats when necessary. Inspection procedures were detailed, including verification of alignment, level, and plumb positioning, checking the smooth operation of doors and windows, and assessing the frames’ durability and structural integrity. The chapter also covered adjustments and corrections, addressing the rectification of minor defects, reinforcement of weak points or loose fixings, and ensuring compliance with project specifications and industry standards. Finally, the cleaning and maintenance of installed frames were addressed, focusing on the removal of protective coverings and excess finishes, surface cleaning to improve appearance, and guidance on long-term care to sustain frame quality.
Self-Assessment
🔒 PDFDownload this self-assessment, with answers
A. Written Assessment
- What is the primary reason for removing excess adhesives and sealants before finishing a door frame? (2 marks)
- Describe two types of fillers commonly used to fill gaps or holes in wooden frames and their suitability. (3 marks)
🔒20 more in this section.
Chapter Examination Questions
🔒 PDFDownload these examination questions, with worked answers
SECTION A (40 Marks) - Answer ALL Questions
- Describe the process of removing excess adhesives and sealants from a newly installed wooden door frame to ensure a smooth finish. (4 marks)
- Explain why sanding rough edges and surfaces is essential before applying a protective finish on window frames. (4 marks)
🔒18 more in this section.
Chapter Practical Activities
Practical 1: Surface Preparation of Installed Door and Window Frames
Carpentry and Joinery · Level 4
Door And Window Frames
PRACTICAL ASSESSMENT
TIME: 4 HOURS
⬇ PDFCandidate Instructions (Candidate Tool)
Type: Individual
INSTRUCTIONS TO CANDIDATE:
1. You are required to perform the following task:
i. Prepare the surfaces of installed door and window frames measuring approximately 2100mm height by 900mm width by sanding edges and removing excess adhesives and debris for a smooth finish.
2. You have been provided with the following resources for the practical task:
| Tools & Equipment | Materials |
|---|
| Putty knife | Safety boots |
| Chisel 1/2" | Dustcoat/Overall |
| Scraper | Leather gloves |
| Brush (soft bristle) | |
| Sand paper (P120) | |
⬇ PDFResources Required (Cutting List)
| S/N | Item | Quantity |
|---|
| 1 | Safety boots | 1 Pair per Candidate |
| 2 | Dustcoat/Overall | 1 per Candidate |
| 3 | Leather gloves | 1 Pair per Candidate |
| 4 | Sand paper (P120) | 300 mm strip per Candidate |
| 5 | Putty knife | 1 per Candidate |
| 6 | Chisel 1/2" | 1 per Candidate |
| 7 | Scraper | 1 per Candidate |
| 8 | Brush (soft bristle) | 1 per Candidate |
⬇ PDFAssessor Guide
| Items to be Evaluated | Marks Available | Marks Obtained | Comments |
|---|
| TASK 1: Surface Preparation of Installed Frames |
Identified and used PPEs in line with occupational safety and health regulations (Safety boots, Dustcoat/Overall, Leather gloves)
(Award 1 mark for each correct PPE worn or zero) | 3 | | |
Assembled required tools and materials (Putty knife, Chisel 1/2", Scraper, Brush, Sand paper P120)
(Award 1 mark for each category assembled or zero) | 3 | | |
Removed excess adhesives, sealants, and debris from door and window frame surfaces
(Award 5 marks for thorough removal or zero) | 5 | | |
Sanded rough edges and surfaces uniformly for a smooth finish
(Award 5 marks for even sanding and smooth finish or zero) | 5 | | |
Cleaned surfaces using brush to remove dust and residues after sanding
(Award 2 marks for complete cleaning or zero) | 2 | | |
Performed workplace housekeeping by collecting tools and cleaning the work area
(Award 2 marks for proper housekeeping or zero) | 2 | | |
| Sub-Total | 20 | | |
| PRODUCT CHECKLIST |
Smoothness and uniformity of surfaces on door and window frames (approx. 2100mm x 900mm)
(Award 5 marks for smooth, even surfaces free of rough patches or zero) | 5 | | |
No residual excess adhesives, sealants, or debris visible on surfaces
(Award 5 marks for complete removal or zero) | 5 | | |
Edges are sanded cleanly without damage to frame profiles
(Award 5 marks for neatly sanded edges or zero) | 5 | | |
Overall appearance of the prepared frames is neat and ready for finishing
(Award 5 marks for professional appearance or zero) | 5 | | |
| Sub-Total | 20 | | |
| GRAND TOTAL | 40 | | |
ASSESSMENT OUTCOME: ☐ Competent ☐ Not Yet Competent (competent if at least 50%)
Practical 2: Fill gaps and holes in installed door and window frames using appropriate fillers
Carpentry and Joinery · Level 4
Door And Window Frames
PRACTICAL ASSESSMENT
TIME: 4 HOURS
⬇ PDFCandidate Instructions (Candidate Tool)
Type: Individual
INSTRUCTIONS TO CANDIDATE:
1. You are required to perform the following task:
i. Fill all visible gaps and holes in installed door and window frames measuring approximately 2100mm height x 900mm width using appropriate wood filler to achieve a uniform smooth surface.
2. You have been provided with the following resources for the practical task:
| Tools & Equipment | Materials |
|---|
| Putty knife | Wood filler paste |
| Sandpaper (P120 grit) | Water container |
| Dust brush | Safety gloves |
| Cloth rag | Safety goggles |
⬇ PDFResources Required (Cutting List)
| S/N | Item | Quantity |
|---|
| 1 | Wood filler paste | 250g per Candidate |
| 2 | Putty knife | 1 Pc per Candidate |
| 3 | Sandpaper (P120 grit) | 300mm length per Candidate |
| 4 | Cloth rag | 1 Pc per Candidate |
| 5 | Dust brush | 1 Pc per Candidate |
| 6 | Water container | 1 Pc per 3 Candidates |
| 7 | Safety gloves | 1 Pair per Candidate |
| 8 | Safety goggles | 1 Pc per Candidate |
⬇ PDFAssessor Guide
| Items to be Evaluated | Marks Available | Marks Obtained | Comments |
|---|
| TASK 1: Prepare and Apply Filler |
Wore Personal Protective Equipment (safety gloves and goggles)
(Award 1 mark each for gloves and goggles correctly worn or 0) | 2 | | |
Assembled required tools and materials for filling gaps
(Award 1 mark for complete and correct tools/materials assembled or 0) | 1 | | |
Cleaned surface areas around gaps and holes using dust brush and cloth rag
(Award 2 marks for thorough cleaning or 0) | 2 | | |
Applied wood filler paste neatly and adequately to all visible gaps and holes using putty knife
(Award 4 marks for neat, full, and consistent application or 0) | 4 | | |
Allowed filler to dry for appropriate time before sanding
(Award 1 mark for adequate drying or 0) | 1 | | |
Sanded filled areas smoothly using sandpaper (P120 grit) to achieve uniform surface
(Award 3 marks for smooth finish and no visible excess filler or 0) | 3 | | |
Cleaned work area and tools after completion
(Award 2 marks for proper housekeeping or 0) | 2 | | |
| Sub-Total | 15 | | |
| PRODUCT CHECKLIST |
All visible gaps and holes filled with wood filler and finished to a smooth, uniform surface with no cracks or depressions
(Award up to 10 marks for complete, smooth, and uniform filling with no defects or 0) | 10 | | |
Dimensions of the filled frame surface approximately 2100mm height x 900mm width maintained without damage
(Award 5 marks for correct dimensions maintained or 0) | 5 | | |
General appearance of the finished frame is neat and professional
(Award 5 marks for neat and professional appearance or 0) | 5 | | |
| Sub-Total | 20 | | |
| GRAND TOTAL | 35 | | |
ASSESSMENT OUTCOME: ☐ Competent ☐ Not Yet Competent (competent if at least 50%)
🔒Selection of Protective and Decorative Finishes for Door and Window FramesPractical 3
🔒Apply Finishing Materials on Door and Window FramesPractical 4
🔒Drying and Recoating of Finishes on Installed Door FramePractical 5
🔒Inspect Installed Door and Window Frames for Alignment, Level, and PlumbPractical 6
🔒Check Smooth Operation of Installed Doors and WindowsPractical 7
🔒Assessment of Durability and Structural Integrity of Installed Door and Window FramesPractical 8
🔒Rectify minor defects in installed door and window framesPractical 9
🔒Reinforce Weak Points and Fixings on Installed Door FramePractical 10
🔒Measure and Verify Installed Door and Window Frames for CompliancePractical 11
🔒Removal of Protective Coverings and Excess Finishing Materials from Installed Door and Window FramesPractical 12
🔒Cleaning and wiping down door and window framesPractical 13
🔒Advise on Long-Term Care and Maintenance of Installed Door and Window FramesPractical 14
🔒Final Inspection and Quality Assurance of Installed Door and Window FramesPractical 15
