Maintaining welding machines, tools and equipment is fundamental for welding professionals in Kenya to ensure safety, efficiency and quality in their work. Proper upkeep reduces downtime, extends the lifespan of costly equipment and prevents accidents on site. Welding workshops across Nairobi, Mombasa and other industrial hubs depend heavily on well-maintained tools to meet production deadlines and uphold standards. This chapter focuses on practical methods for repairing key welding tools, ensuring welders can maintain optimal performance in their daily tasks.
3.1 Welding tools repair
Welding tools are subject to heavy wear and damage due to intense heat, mechanical stress and frequent handling. Repairing these tools promptly safeguards the welding process integrity and worker safety. Each tool component requires specific attention to restore its function and durability. Below, we examine the main parts of welding tools that often require repair and maintenance.
3.1.1 Handles
Handles provide the grip and control for many welding tools such as hammers, wire brushes and chipping hammers. A damaged or worn handle compromises safety and precision, making its repair critical in welding workshops.
Common Handle Materials and Their Properties
Handles are typically made from wood, fiberglass or metal, each with advantages and vulnerabilities.
- Wooden handles offer good grip and shock absorption but are prone to splintering and cracking under heavy use.
- Fiberglass handles resist heat and impact better than wood, making them common in professional welding tools.
- Metal handles are durable but can become hot during welding and may require insulation or grips for safety.
- Plastic-coated handles provide comfort and electrical insulation but degrade under UV exposure and heat.
- Rubberized grips improve control and reduce vibration but may wear out faster in abrasive environments.
Signs of Handle Damage Requiring Repair
Welders must inspect handles regularly to identify issues before accidents occur.
- Cracks or splits in wooden handles reduce strength and can cause sudden breakage.
- Loose attachment to the tool head leads to instability and loss of control.
- Worn or smooth surfaces impair grip, increasing the risk of slipping.
- Burn marks or melting on plastic or rubber grips indicate heat damage.
- Deformation or bending in metal handles affects ergonomics and safety.
Techniques for Repairing Handles
Effective repair restores the tool’s usability and safety for welding professionals.
- Replacing wooden handles involves removing the old handle, shaping a new one to fit, and securing it firmly with wedges or epoxy.
- Tightening loose handles may require adding wedges, pins or adhesive to ensure a solid connection.
- Sanding and refinishing wooden handles improves grip and removes splinters.
- Applying heat-resistant sleeves or grips protects metal handles from heat and enhances comfort.
- Using fiberglass or composite replacements prolongs handle life in harsh welding environments.
Safety Considerations During Handle Repair
Maintaining safety standards during repair prevents further hazards.
- Wear protective gloves to avoid splinters or cuts when handling damaged handles.
- Ensure tools are disconnected from power sources before repair.
- Use appropriate adhesives and fillers rated for heat resistance.
- Test repaired handles under load to confirm stability before use in welding.
- Dispose of severely damaged handles that cannot be safely repaired.
3.1.2 Heads
The heads of welding tools such as hammers, wire brushes and slag removers endure intense impact and heat, requiring frequent repair to maintain effectiveness.
Types of Heads Commonly Repaired
Different welding tools use heads designed for specific functions and materials.
- Chipping hammer heads are usually steel and must remain sharp for slag removal.
- Wire brush heads have bristles made from stainless steel or brass for cleaning weld surfaces.
- Sledgehammer heads provide heavy impact for metal shaping or demolition.
- Mallet heads made of rubber or plastic deliver softer blows without damaging workpieces.
- Scraper heads remove paint, rust or slag from welded joints.
Damage Patterns in Tool Heads
Identifying the common wear types allows welders to plan appropriate repairs.
- Chipping hammer heads develop blunt or chipped edges reducing slag removal efficiency.
- Wire brush bristles bend, break or corrode, diminishing cleaning performance.
- Sledgehammer heads can crack or deform after repeated heavy impacts.
- Mallet heads may wear unevenly or develop tears in rubber surfaces.
- Scraper heads lose sharpness or suffer surface corrosion.
Repair and Maintenance Procedures for Heads
Restoring heads to functional condition involves reshaping, replacing or reinforcing parts.
- Grinding or filing blunt chipping hammer heads restores sharpness for effective slag removal.
- Replacing wire brush heads or individual bristles maintains cleaning efficiency.
- Welding cracks in sledgehammer heads can extend their service life.
- Applying rubber patches or replacement mallet heads renews shock absorption.
- Cleaning and sharpening scrapers improve surface preparation for welding.
Material Compatibility and Heat Treatment
Repair methods must consider the material properties and heat exposure.
- Steel heads require heat treatment after welding repairs to restore hardness and toughness.
- Wire brushes must use corrosion-resistant bristles to withstand welding fumes and moisture.
- Avoid excessive grinding on tool heads to prevent weakening the metal.
- Use compatible filler metals during welding repairs to maintain original strength.
- Inspect repaired heads for structural integrity before returning to use.
3.1.3 Jaws
Jaws are critical parts of welding clamps, pliers and holders that secure workpieces during welding. Their condition directly affects weld accuracy and safety.
Functional Role of Jaws in Welding Tools
Jaws must firmly grip materials without causing damage or slippage.
- Clamping jaws hold metal parts steady to prevent movement during welding.
- Pliers' jaws manipulate wires, rods or small components precisely.
- Holder jaws secure electrodes or filler materials to the welding machine.
- Adjustable jaws allow versatility for different workpiece sizes.
- Insulated jaws protect welders from electric shock.
Common Forms of Jaw Damage
Damage to jaws can compromise grip strength and safety.
- Worn or flattened gripping surfaces reduce friction and cause slippage.
- Bent or misaligned jaws prevent proper closure and secure hold.
- Corrosion and rust weaken metal and impair function.
- Broken or missing teeth on serrated jaws reduce grip effectiveness.
- Damaged insulation on jaws increases electrical hazard.
Repair Strategies for Welding Tool Jaws
Repairing jaws ensures reliable clamping and handling during welding operations.
- Filing or machining worn gripping surfaces restores texture for better grip.
- Straightening bent jaws carefully with a vice and hammer realigns jaws.
- Removing rust by wire brushing and applying anti-corrosion coatings prolongs jaw life.
- Replacing broken teeth or jaws is necessary when damage is severe.
- Reapplying or replacing insulation sleeves on jaws maintains electrical safety.
Importance of Precision in Jaw Repairs
Precision in jaw repair is essential to maintain welding quality and operator safety.
- Misaligned jaws cause uneven pressure that can distort workpieces.
- Uneven gripping surfaces may damage delicate metals or coatings.
- Proper insulation prevents electric shock hazards common in arc welding.
- Secure jaw repairs reduce tool failure risks during critical welding tasks.
- Regular calibration of adjustable jaws ensures consistent clamping force.
3.1.4 Blades
Blades are integral parts of cutting tools used in welding workshops to prepare metals before welding or clean weld beads after.
Types of Blades in Welding Tools
Different blades serve specific cutting and cleaning functions.
- Cutting blades in metal shears enable shaping of sheet metals.
- Scraper blades remove slag, spatter and excess weld material.
- Utility knife blades are used for trimming welding rods or insulation.
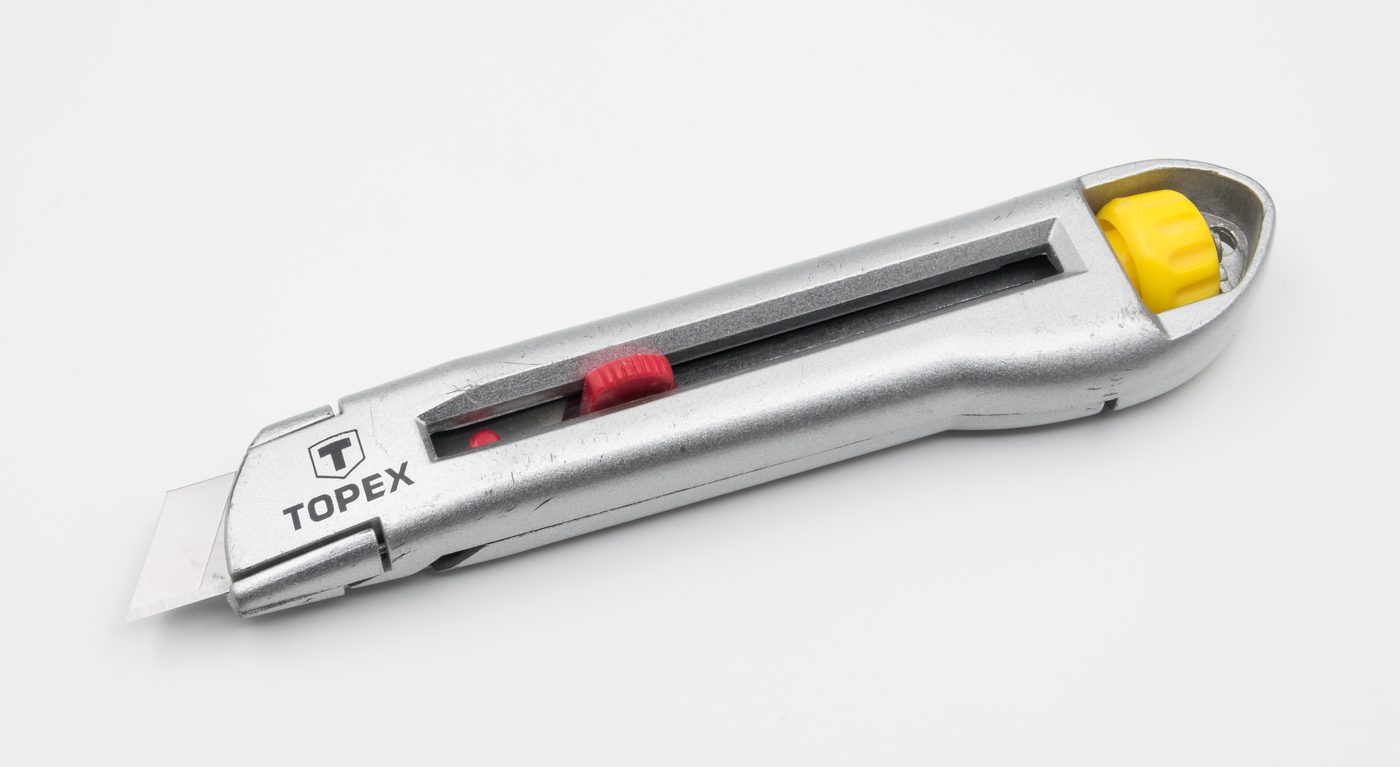
utility knife with blade extended (Source: Wikimedia Commons)
- Grinding blades attached to angle grinders shape and smooth welds.
- Wire cutting blades in pliers or cutters trim welding wire.
Blade Wear and Damage in Welding Environments
Blades are exposed to abrasive materials and heat, accelerating wear.
- Blunt blades reduce cutting efficiency and increase operator effort.
- Chipped or cracked blades cause uneven cuts and safety risks.
- Heat damage can warp or dull blades especially in grinding discs.
- Corrosion weakens blade edges particularly in humid workshop conditions.
- Excessive vibration leads to blade fatigue and failure.
Blade Sharpening and Replacement Techniques
Maintaining sharp blades improves productivity and safety.
- Using bench grinders or sharpening stones restores edge sharpness.
- Replacing worn or damaged blades prevents accidents and poor cuts.
- Balancing blades on grinders reduces vibration and uneven wear.
- Cleaning blades after use prevents corrosion and buildup.
- Storing blades properly in dry conditions extends lifespan.
Safety Measures When Handling and Repairing Blades
Blades pose cutting hazards requiring careful handling during repairs.
- Always wear cut-resistant gloves when sharpening or replacing blades.
- Ensure blades are securely mounted before use to prevent accidents.
- Disconnect power tools prior to blade maintenance.
- Use appropriate eye protection to guard against flying sparks or debris.
- Dispose of damaged blades safely to avoid injuries.
3.1.5 Discs and wheels
Grinding and cutting discs and wheels are essential consumables in welding workshops, used for surface preparation and cutting metals to size.
| Name |
Specification |
Use |
| Cutting Disc |
180mm diameter, 3mm thickness |
Cutting metal sheets and rods |
| Grinding Wheel |
150mm diameter, 20mm thickness |
Grinding weld beads and surface prep |
| Flap Disc |
125mm diameter, 22mm thickness |
Blending and finishing welds |
| Wire Wheel |
100mm diameter, steel bristles |
Cleaning rust and paint from metals |
| Abrasive Disc |
230mm diameter, 6mm thickness |
Heavy-duty metal cutting and grinding |
Wear and Damage Patterns in Discs and Wheels
Discs and wheels degrade with use and improper handling.
- Cracks or fractures in discs cause dangerous breakages during operation.
- Worn edges reduce cutting or grinding effectiveness and increase time.
- Contamination with oil or grease lowers abrasive action and safety.
- Uneven wear leads to tool vibration and poor finish quality.
- Loose mounting causes imbalance and rapid disc failure.
Inspection and Testing Procedures Before Use
Ensuring discs and wheels are safe and functional prevents accidents.
- Visual inspection for cracks, chips or discoloration is mandatory.
- Ring testing involves tapping discs to detect internal cracks by sound.
- Checking mounting flanges and spindles for damage ensures secure fitting.
- Verifying disc specifications match tool ratings prevents overload.
- Confirming expiration dates on abrasive discs maintains performance standards.
Proper Storage and Handling to Extend Life
Correct storage preserves disc integrity and performance.
- Store discs flat in dry, cool environments away from sunlight.
- Avoid stacking heavy items on discs to prevent warping.
- Keep discs in original packaging until use to reduce contamination.
- Handle discs carefully to avoid dropping or striking edges.
- Separate abrasive, cutting and grinding discs to prevent mix-ups.
Replacement and Disposal Practices
Safe replacement and disposal protect welders and the environment.
- Replace discs immediately if cracks or excessive wear are detected.
- Use manufacturer-recommended discs for specific machines and materials.
- Dispose of used discs according to workshop hazardous waste protocols.
- Recycle metal cores where possible to reduce environmental impact.
- Document disc usage and replacements for quality assurance records.
Practice Questions
- Explain five common types of damage found on welding tool handles and their impact on welding safety. (10 marks)
- Describe the steps involved in repairing a loose handle on a welding chipping hammer. (12 marks)
- Discuss the importance of jaw alignment in welding clamps and five methods to repair damaged jaws. (10 marks)
- List and explain five safety precautions to observe when sharpening blades used in welding workshops. (10 marks)
- Identify five key inspection points for grinding discs before use and explain why each is critical. (10 marks)
The rest of this chapter
🔒Create a free account to open more of this chapter.
Free: practical guides, quick cards, workplace scenarios and more.
Create a free account 🔒3.2 Preventive maintenance of fabrication machines and equipment
Preventive maintenance is the scheduled work done on welding machines and fabrication equipment to prevent failures before they occur. It prolongs machine life, reduces costly downtime, and keeps the operator safe. The three main activities are cleaning the ex…
Chapter Summary
Maintaining welding machines, tools, and equipment is crucial for ensuring safety, efficiency, and longevity in fabrication work. Repairing welding tools involves attention to specific components such as handles, heads, jaws, blades, and discs or wheels, each requiring proper care to function effectively. Handles must be checked for secure grip and durability, while heads and jaws need regular inspection to maintain precise alignment and gripping strength. Blades and discs are critical for cutting and grinding tasks and must be kept sharp and free from damage. Preventive maintenance of fabrication machines includes routine cleaning of external surfaces to remove dust and debris that can impair machine performance. Inspecting cables, connectors, and power sources helps prevent electrical faults and ensures reliable power supply during welding operations. Lubricating moving parts minimizes wear and tear, reducing the risk of breakdowns and extending the lifespan of the equipment. Overall, systematic maintenance practices contribute significantly to operational safety and productivity in welding processes.
Self-Assessment
🔒 PDFDownload this self-assessment, with answers
A. Written Assessment
- What are the common signs that a welding tool handle needs repair? (2 marks)
- Describe the function of the jaws in welding tools and why their maintenance is critical. (3 marks)
🔒20 more in this section.
Chapter Examination Questions
🔒 PDFDownload these examination questions, with worked answers
SECTION A (40 Marks) - Answer ALL Questions
- Describe the procedure for repairing a damaged welding handle on an SMAW electrode holder used at a Nairobi fabrication workshop. (4 marks)
- Explain the importance of inspecting welding machine cables and connectors before commencing welding operations at a county government workshop. (4 marks)
🔒18 more in this section.
Chapter Practical Activities
Practical 1: Repair and replace damaged welding tool handles
Welding · Level 4
Arc Welding Processes I
PRACTICAL ASSESSMENT
TIME: 4 HOURS
⬇ PDFCandidate Instructions (Candidate Tool)
Type: Individual
INSTRUCTIONS TO CANDIDATE:
1. You are required to perform the following task:
i. Repair and replace two damaged welding tool handles measuring 300mm x 30mm x 25mm.
2. You have been provided with the following resources for the practical task:
| Tools & Equipment | Materials |
|---|
| hacksaw | wooden handle blanks 300mm x 30mm x 25mm |
| hand drill with 6mm drill bit | steel welding tool handle clamps |
| clamps | epoxy adhesive |
| hammer | |
| flat file | |
| sandpaper | |
| epoxy adhesive applicator | |
⬇ PDFResources Required (Cutting List)
| S/N | Item | Quantity |
|---|
| 1 | wooden handle blanks 300mm x 30mm x 25mm | 2 Pcs per Candidate |
| 2 | steel welding tool handle clamps | 2 Pcs per Candidate |
| 3 | epoxy adhesive 50ml | 1 bottle per 3 Candidates |
| 4 | sandpaper assorted grit | 1 set per Candidate |
⬇ PDFAssessor Guide
| Items to be Evaluated | Marks Available | Marks Obtained | Comments |
|---|
| TASK 1: Adherence to safety procedures |
Wore appropriate PPE: leather gloves, safety boots, overall
(Award 1 mark for each correctly worn PPE item) | 3 | | |
Ensured work area was clean and free from hazards before starting
(Award 1 mark for safe and clean work environment) | 1 | | |
| Sub-Total | 4 | | |
| TASK 2: Preparation and removal of damaged handles |
Removed damaged wooden handles from welding tools using appropriate tools
(Award 2 marks for safe and correct removal) | 2 | | |
Cleaned and prepared metal tool parts for new handle attachment
(Award 2 marks for proper cleaning and preparation) | 2 | | |
| Sub-Total | 4 | | |
| TASK 3: Fabrication and fitting of new handles |
Cut wooden handle blanks to specified dimensions 300mm x 30mm x 25mm
(Award 2 marks for accurate cutting) | 2 | | |
Drilled holes in wooden handles and metal tool parts for securing clamps
(Award 2 marks for correct drilling) | 2 | | |
Applied epoxy adhesive correctly to bonding surfaces
(Award 1 mark for proper adhesive application) | 1 | | |
Fitted and clamped wooden handles securely to the welding tools
(Award 2 marks for secure fitting and clamping) | 2 | | |
| Sub-Total | 7 | | |
| TASK 4: Finishing and cleanup |
Smoothed and finished wooden handles with sandpaper for safe grip
(Award 2 marks for smooth finish without splinters) | 2 | | |
Cleaned work area and returned tools and unused materials to store
(Award 2 marks for effective housekeeping) | 2 | | |
| Sub-Total | 4 | | |
| PRODUCT CHECKLIST |
Repaired welding tool handles match specified dimensions 300mm x 30mm x 25mm within ±1mm
(Award 2 marks for dimensional accuracy) | 2 | | |
Handles firmly attached with clamps, no movement or looseness
(Award 2 marks for secure attachment) | 2 | | |
Handle surfaces are smooth, free from splinters or sharp edges
(Award 2 marks for quality finish) | 2 | | |
Overall functionality restored and tools safe for use
(Award 2 marks for full restoration of tool usability) | 2 | | |
| Sub-Total | 8 | | |
| GRAND TOTAL | 27 | | |
ASSESSMENT OUTCOME: ☐ Competent ☐ Not Yet Competent (competent if at least 50%)
Practical 2: Repair or replace worn or broken welding tool heads
Welding · Level 4
Arc Welding Processes I
PRACTICAL ASSESSMENT
TIME: 4 HOURS
⬇ PDFCandidate Instructions (Candidate Tool)
Type: Individual
INSTRUCTIONS TO CANDIDATE:
1. You are required to perform the following task:
i. Repair or replace a welding tool head of 150mm length ensuring proper fit and operation.
2. You have been provided with the following resources for the practical task:
| Tools & Equipment | Materials |
|---|
| Hand files | Welding tool heads (worn or broken) |
| Wrench set | Replacement welding tool heads |
| Screwdrivers | |
| Cleaning brush | |
| Emery cloth | |
| Lubricating oil | |
| Cotton rags | |
⬇ PDFResources Required (Cutting List)
| S/N | Item | Quantity |
|---|
| 1 | Welding tool heads (worn or broken) | 1 Pc per Candidate |
| 2 | Replacement welding tool heads | 1 Pc per Candidate |
| 3 | Hand files | 1 Pc per Candidate |
| 4 | Wrench set | 1 Set per Candidate |
| 5 | Screwdrivers (flat and Phillips) | 1 Set per Candidate |
| 6 | Cleaning brush | 1 Pc per Candidate |
| 7 | Emery cloth (medium grit) | 1 Pc per Candidate |
| 8 | Lubricating oil | 50 ml per Candidate |
| 9 | Cotton rags | 3 Pcs per Candidate |
⬇ PDFAssessor Guide
| Items to be Evaluated | Marks Available | Marks Obtained | Comments |
|---|
| TASK 1: Preparation and Safety |
Candidate wears correct PPE: welding shield, safety boots, leather gloves, overall
(Award 1 mark for each correctly worn PPE item) | 4 | | |
Candidate isolates welding machine power supply before starting repair
(Award 1 mark for proper isolation procedure) | 1 | | |
| Sub-Total | 5 | | |
| TASK 2: Removal of Worn or Broken Tool Head |
Candidate correctly loosens and removes the worn or broken welding tool head using appropriate tools
(Award 2 marks for correct removal without damage) | 2 | | |
Candidate cleans the tool head mounting area using brush and emery cloth
(Award 2 marks for thorough cleaning) | 2 | | |
| Sub-Total | 4 | | |
| TASK 3: Repair or Replacement and Assembly |
Candidate files or smoothens worn surfaces of the tool head to restore fit where applicable
(Award 3 marks for proper filing and finishing) | 3 | | |
Candidate fits replacement or repaired tool head ensuring correct alignment and seating
(Award 3 marks for proper fitting and alignment) | 3 | | |
Candidate tightens fasteners securely using correct torque or hand tools
(Award 2 marks for secure fastening) | 2 | | |
Candidate applies lubricating oil to moving parts as necessary
(Award 1 mark for lubrication) | 1 | | |
| Sub-Total | 9 | | |
| TASK 4: Testing and Housekeeping |
Candidate restores power safely and tests tool head operation for correct function
(Award 3 marks for safe and effective testing) | 3 | | |
Candidate cleans work area and returns tools and unused materials to store
(Award 2 marks for proper housekeeping) | 2 | | |
| Sub-Total | 5 | | |
| PRODUCT CHECKLIST |
Repaired or replaced welding tool head fits correctly with no visible gaps or misalignment
(Award 2 marks for proper fit and alignment) | 2 | | |
Tool head operates smoothly without obstruction or looseness
(Award 2 marks for proper operation) | 2 | | |
Surface finish on repaired areas is smooth and free from burrs or sharp edges
(Award 2 marks for quality finishing) | 2 | | |
| Sub-Total | 6 | | |
| GRAND TOTAL | 29 | | |
ASSESSMENT OUTCOME: ☐ Competent ☐ Not Yet Competent (competent if at least 50%)
🔒Repair and adjust welding tool jaws for secure grippingPractical 3
🔒Repair blades on welding tools to maintain cutting efficiencyPractical 4
🔒Replace discs and wheels on welding machines for optimal performancePractical 5
🔒Perform Preventive Maintenance on an Arc Welding Machine Model AW-300Practical 6
🔒Cleaning external surfaces of welding machinesPractical 7
🔒Inspect welding machine cables and connectors for damage and electrical safety compliancePractical 8
🔒Inspection and Testing of Welding Machine Power SourcesPractical 9
🔒Lubricate moving parts of welding machinesPractical 10
