Welding Technology  ·  Level 5
Technical Drawing
Chapter 1: Use technical drawing tools, equipment and materials
📚 3 Topics
⚑ What you will be able to do

By the end of this chapter, you will be able to:

  • Identify and gather all the drawing equipment needed for your technical drawing tasks.
  • Identify and collect the appropriate drawing materials required to complete your work.
  • Use the drawing equipment correctly and safely according to the specific task at hand.

Mastering these skills will help you create accurate and professional technical drawings, which are essential for success in many trades.

This chapter introduces the essential tools, equipment and materials used in technical drawing across diverse professional fields in Kenya. Mastery of these instruments ensures accuracy, clarity and professionalism in visual communication, whether preparing architectural plans for a county government office, designing layouts for a retail business, or illustrating processes in a hospital setting. Understanding the specifications and proper handling of drawing equipment enhances productivity and maintains quality standards required in diploma-level technical drawing tasks.

1.1 Drawing Equipment

Drawing equipment forms the foundation for producing precise and standardized technical drawings. These tools facilitate the creation of straight lines, accurate angles, and consistent measurements vital in conveying technical information clearly. In Kenya’s multidisciplinary work environments, such as universities, SACCOs, and agricultural cooperatives, proficiency with these instruments supports effective communication across departments and sectors.

1.1.1 T Square

Name Specification Use
T Square Rigid, flat blade with perpendicular stock, typically 60 cm or 90 cm long-made of plastic or wood Drawing horizontal lines and guiding set squares for vertical/angled lines

Design and Structure of the T Square

The T square consists of two main parts: the blade and the stock. The blade is a long, flat, straight edge, usually transparent or opaque plastic, providing a smooth surface for drawing lines. The stock is a thicker, perpendicular piece attached at one end of the blade, ensuring the blade remains at a perfect right angle to the edge of the drawing board.

  • Rigid construction ensures stability during use, preventing bending that can distort lines.
  • Length options such as 60 cm or 90 cm accommodate various drawing sheet sizes, from A3 to A1.
  • Material choice affects durability and weight; plastic is lightweight and resistant to moisture, while wooden T squares offer a traditional feel.
  • Edge precision is critical; the blade edges must be perfectly straight for accurate line drawing.
  • Stock thickness provides a firm grip against the drawing board edge to maintain alignment.

Importance of the T Square in Technical Drawing

  • Horizontal alignment ensures uniformity in drawing components such as floor plans or mechanical parts.
  • Supports set squares to draw vertical and angled lines accurately by acting as a base.
  • Maintains consistent scale by enabling parallel lines to be drawn at precise intervals.
  • Reduces errors associated with freehand drawing, enhancing professional presentation.
  • Facilitates quick measurements when combined with scaled rulers.

Proper Use and Handling of the T Square

To maximize accuracy and prolong tool life, correct use and care are essential.

  • Place the stock firmly against the drawing board edge to prevent movement.
  • Draw lines by moving the pencil or pen along the blade edge without shifting the T square.
  • Avoid applying excessive pressure that could warp the blade.
  • Store the T square flat or hanging on a wall hook to prevent bending.
  • Clean the blade regularly to remove graphite or ink residue, ensuring smooth line drawing.

Common Mistakes and How to Avoid Them When Using a T Square

Misuse of the T square can lead to inaccurate drawings and poor work quality.

  • Not securing the stock properly causes the blade to slip, resulting in crooked lines.
  • Using a bent or damaged T square compromises line straightness; always inspect before use.
  • Applying uneven pressure may cause the T square to shift mid-line.
  • Drawing freehand without blade guidance defeats the purpose of the tool.
  • Ignoring cleaning and maintenance leads to ink buildup, affecting line clarity.

1.1.2 Set Square

Name Specification Use
Set Square Triangular plastic or wooden tool with fixed angles: commonly 45°, 30°-60°, size around 15-20 cm Drawing vertical, angled lines and measuring specific angles

Types and Angles of Set Squares

Set squares come primarily in two standard types, each designed to deliver specific angles crucial in technical drawing.
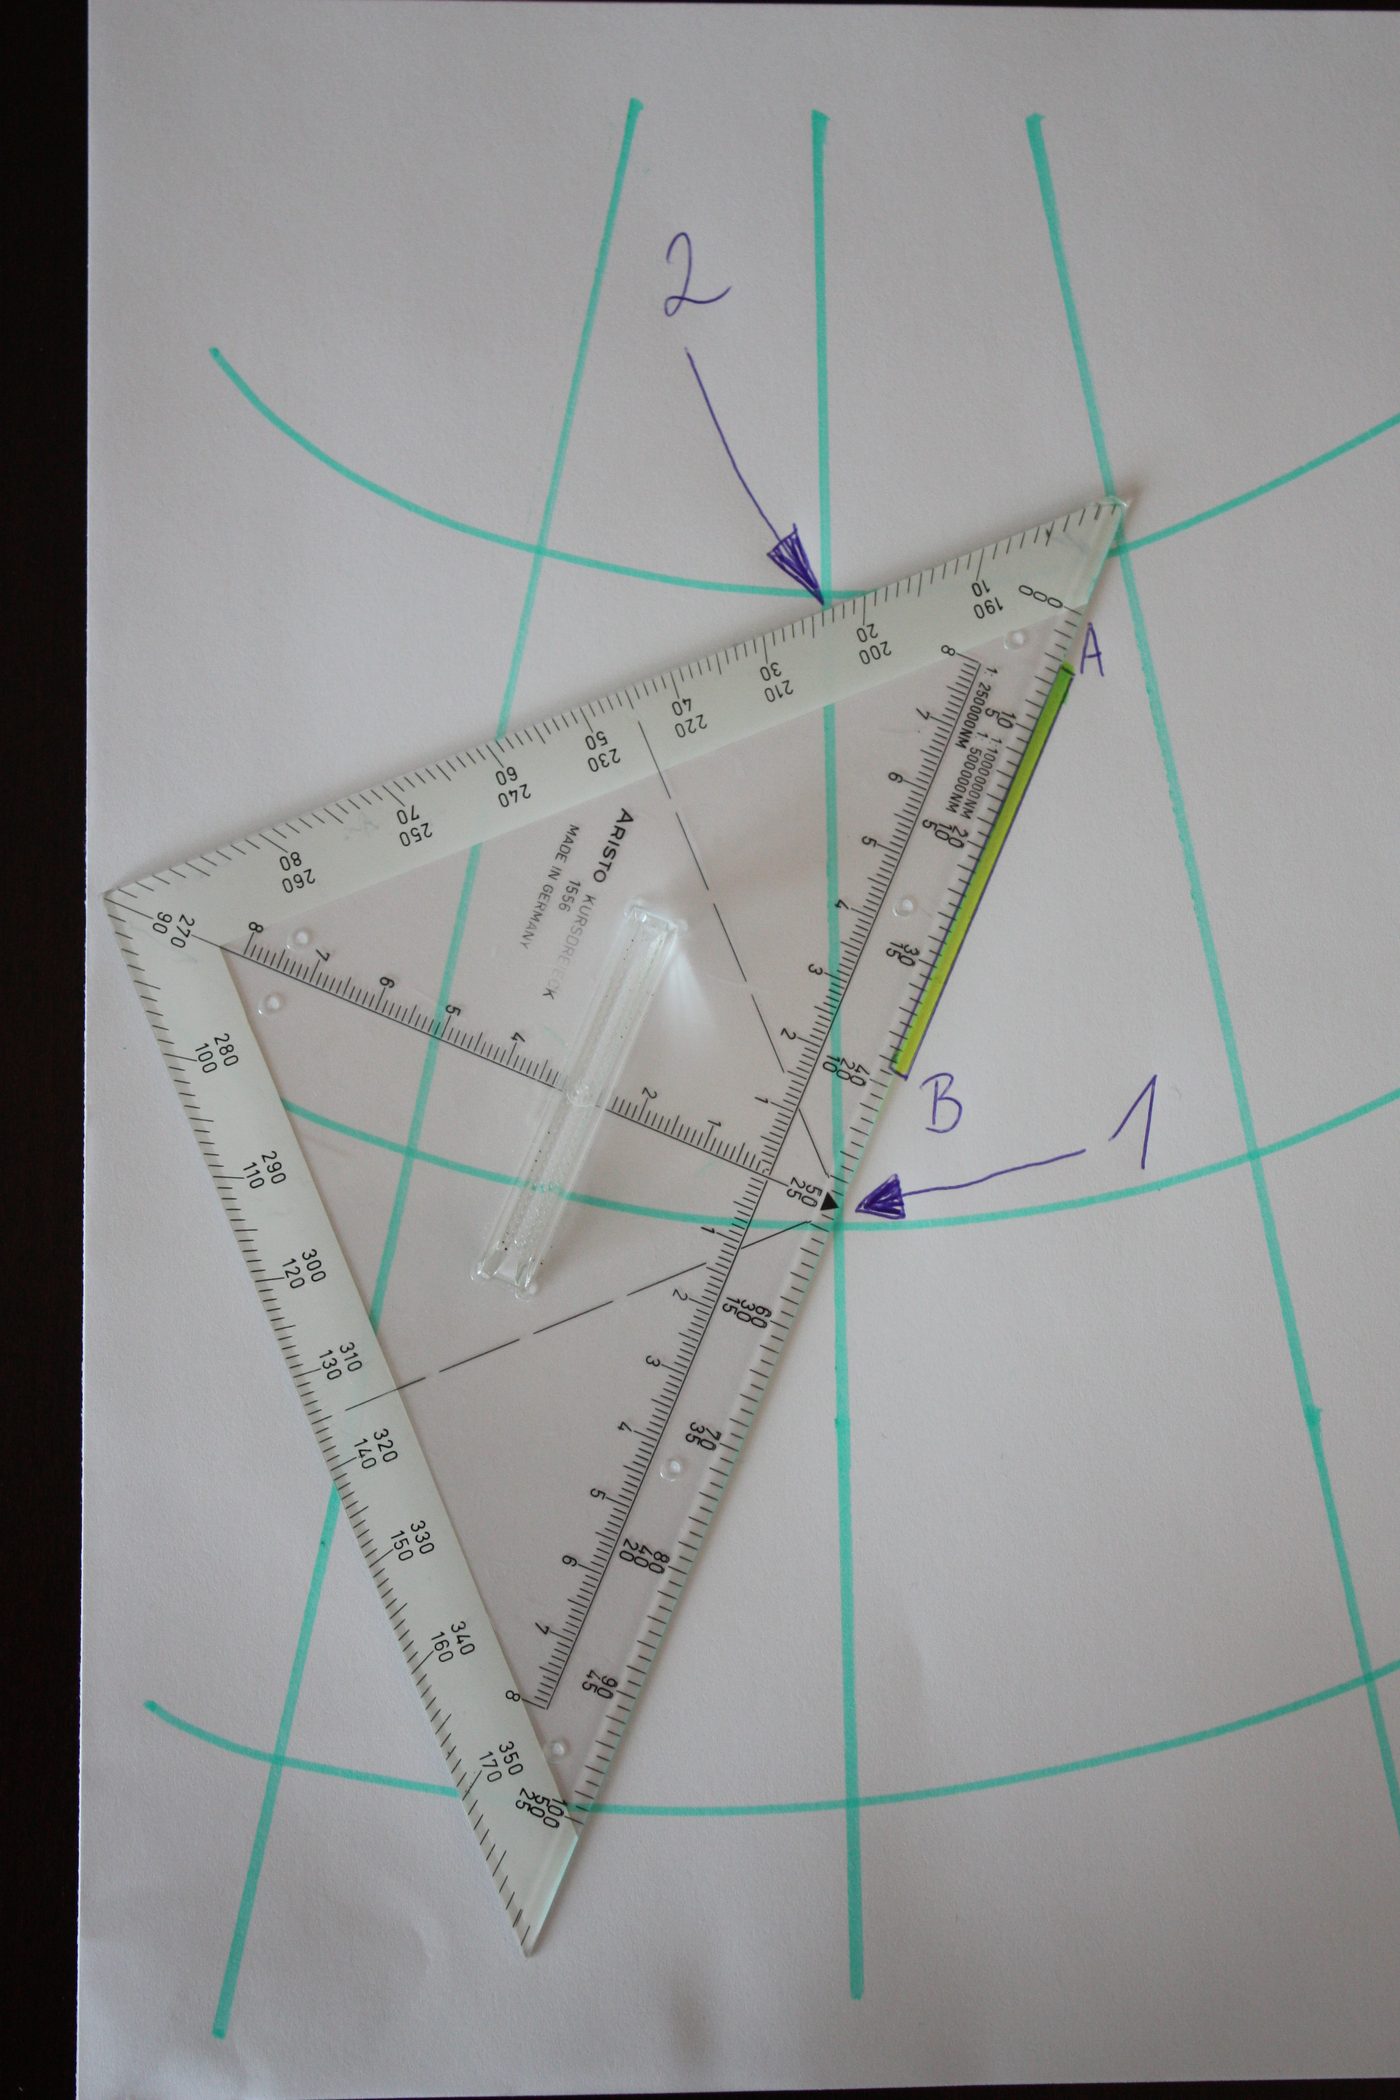
  • 45° Set Square has two equal legs and a right angle, enabling quick drawing of 45°, 90°, and 135° angles.

45° set square on graph paper
45° set square on graph paper (Source: Wikimedia Commons)

  • 30°-60° Set Square provides three angles: 30°, 60°, and 90°, essential for isometric and orthographic projections.
  • Material is usually transparent plastic allowing visibility of the drawing beneath.
  • Size varies but typically ranges between 15 cm and 20 cm for ease of handling.
  • Edge quality must be sharp and straight for precise line drawing.

Role of Set Squares in Technical Drawing

Set squares complement the T square by enabling the drawing of vertical and angled lines with precision.

  • Drawing perpendicular lines by aligning the right angle edge with the T square.
  • Creating standard angle lines such as 30°, 45°, and 60°, essential in projections and detailed drawings.
  • Checking angular accuracy in existing drawings.
  • Supporting isometric drawing techniques for 3D representation.
  • Facilitating repetitive angle drawing with speed and consistency.

Using Set Squares Correctly

Correct technique ensures the reliability of lines drawn with set squares.

  • Align one edge of the set square firmly against the T square’s blade for stable guidance.
  • Hold the set square firmly to avoid slipping during line drawing.
  • Use the transparent body to position lines precisely on the drawing sheet.
  • Apply consistent pressure when drawing to produce clean lines.
  • Store in a protective case to prevent damage to edges.

Typical Errors and Best Practices with Set Squares

Awareness of common pitfalls improves drawing quality.

  • Misalignment with the T square causes skewed angles.
  • Using worn or chipped edges leads to inaccurate lines.
  • Applying uneven pressure can shift the set square.
  • Ignoring the drawing surface cleanliness may cause slipping.
  • Not verifying angles with a protractor when precision is critical.

1.1.3 Protractor

Name Specification Use
Protractor Semi-circular or circular transparent plastic, graduated in degrees from 0° to 180° or 360°, size approx. 10-15 cm diameter Measuring and drawing precise angles

Structure and Types of Protractors

Protractors are designed to measure and construct angles accurately in technical drawings.
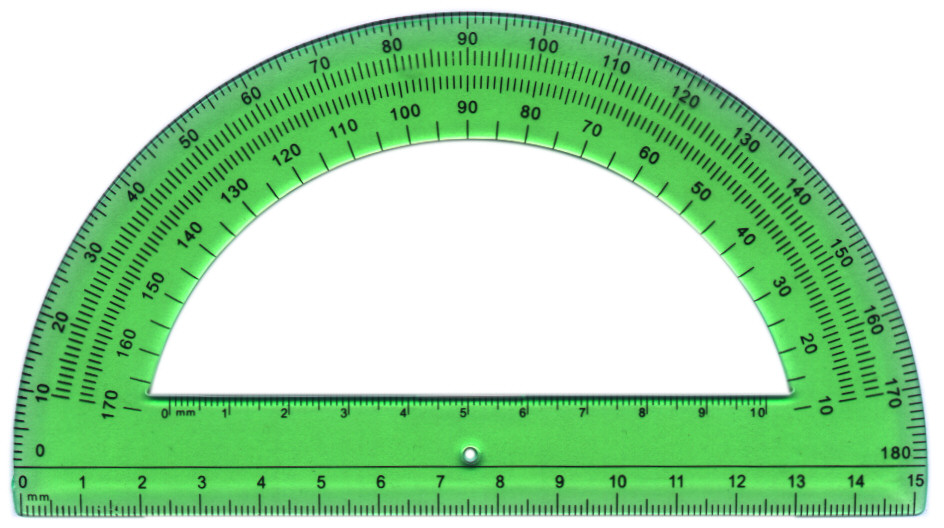
  • Semi-circular protractor measures angles from 0° to 180°, commonly used in most drawing tasks.

Green semi-circular protractor with ruler
Green semi-circular protractor with ruler (Source: Wikimedia Commons)

  • Full circular protractor measures 0° to 360°, suitable for complex angle measurements.
  • Transparent plastic body allows visibility of the drawing beneath.
  • Degree markings are clearly printed for precise reading.
  • Center hole or notch helps align the protractor accurately with vertex points.

Importance of Protractors in Technical Drawing

Protractors provide angle measurement and verification essential in many professional drawings.

  • Ensures angular accuracy in architectural, mechanical, and process diagrams.
  • Facilitates construction of angles for components such as roof pitches or machine parts.
  • Allows verification of existing angles to maintain drawing standards.
  • Supports compliance with Kenya Bureau of Standards (KEBS) angle tolerances.
  • Enables angular dimensioning in engineering and design documentation.

How to Measure and Draw Angles Using a Protractor

Accurate angle construction involves systematic steps.

  1. Place the protractor’s center hole exactly over the angle vertex.
  2. Align the baseline of the protractor with one side of the angle.
  3. Read the degree measurement where the other side of the angle crosses the protractor scale.
  4. To draw an angle, mark the required degree on the paper using the protractor scale.
  5. Remove the protractor and use a ruler or straightedge to connect the vertex to the marked point.
  6. Double-check the angle with the protractor for accuracy.

Common Problems When Using Protractors and Solutions

Recognizing and correcting mistakes ensures precision.

  • Misplacing the center hole leads to incorrect angle measurement.
  • Reading the wrong scale (inner vs. outer) causes errors; always verify scale orientation.
  • Parallax error occurs when viewing the scale at an angle; view directly above.
  • Using damaged or faded protractors reduces reading clarity.
  • Ignoring verification steps may propagate errors in complex drawings.

1.1.4 Engineering Drawing Set

Name Specification Use
Engineering Drawing Set Typically includes a T square, 30° and 45° set squares, protractor, compass, dividers, and a scale ruler; made of plastic or metal Comprehensive toolkit for creating detailed technical drawings

Components of an Engineering Drawing Set

An engineering drawing set bundles essential instruments for precision drawing.
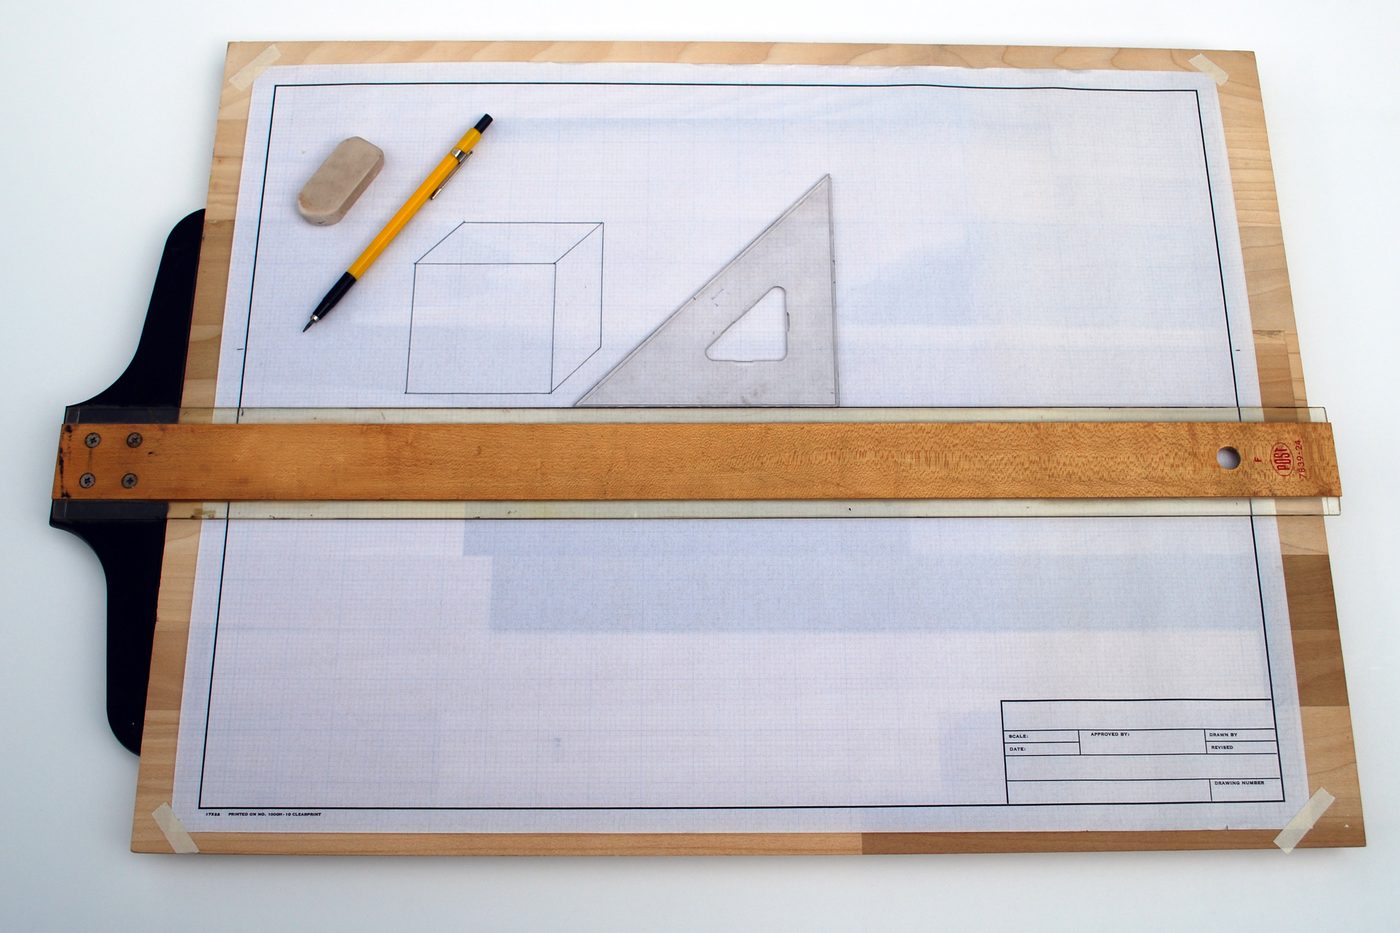
  • T square for horizontal lines and set square alignment.

A T-square on a drawing board
A T-square on a drawing board (Source: Wikimedia Commons)

  • Set squares (30°-60° and 45°) for vertical and angled lines.
  • Protractor for angle measurement.

  • Compass for drawing arcs and circles with adjustable radius.

  • Dividers for transferring measurements and marking equal distances.

  • Scale ruler graduated in metric units for accurate measurement and scaling.
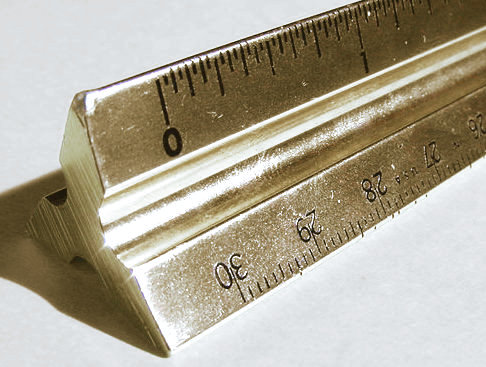
Triangular scale ruler used in civil engineering
Triangular scale ruler used in civil engineering (Source: Wikimedia Commons)

Importance of an Engineering Drawing Set in Professional Practice

Having a complete set streamlines technical drawing processes across disciplines.

  • Ensures availability of all necessary tools in one package.
  • Promotes efficiency by reducing tool search time.
  • Supports accuracy by providing calibrated instruments.
  • Facilitates standard compliance with Kenya Bureau of Standards and ISO drawing conventions.
  • Enhances professionalism in presentations and documentation.

How to Use Engineering Drawing Set Tools Together

Integration of tools leads to comprehensive and precise drawings.

  • Use the T square as a base for aligning set squares to draw vertical and angled lines.
  • Employ the protractor to verify angles created with set squares or freehand.
  • Draw circles and arcs with the compass set to precise radii.
  • Transfer measurements between drawing sections using dividers.
  • Apply the scale ruler to measure and convert dimensions according to drawing scale.

Maintenance and Storage of Engineering Drawing Sets

Proper care extends tool lifespan and maintains functionality.

  • Clean tools after each use to remove ink, graphite, and dust.
  • Store in a rigid case to prevent damage during transport.
  • Periodically check for wear or damage, replacing parts as needed.
  • Avoid exposure to extreme temperatures or moisture that can warp plastic or rust metal parts.
  • Lubricate moving parts of compasses and dividers to ensure smooth operation.

Practice Questions

  1. List and explain five key specifications of a T square and their relevance to technical drawing accuracy. (10 marks)

  2. Describe the step-by-step procedure for drawing a 45° angle using a set square and T square. (12 marks)

  3. Explain how to measure an angle of 120° using a protractor, including precautions to avoid common errors. (10 marks)

  4. Identify the components of an engineering drawing set and discuss how each contributes to the drawing process. (15 marks)

The rest of this chapter
🔒

Create a free account to open more of this chapter.

Free: practical guides, quick cards, workplace scenarios and more.

Create a free account
🔒1.2 Drawing materials

In Kenyan professional settings across sectors such as county referral hospitals, universities, retail businesses, and agricultural cooperatives, the choice of proper drawing materials significantly influences the quality and clarity of technical drawings. Dra…

🔒1.3 Use and maintenance of drawing equipment

In Kenya’s diverse professional environments, from county government offices to agricultural cooperatives, effective use and upkeep of technical drawing equipment is essential. Proper handling ensures precision in drawings and prolongs the life of tools, reduc…

Chapter Summary

This chapter covered the essential drawing equipment required for technical drawing, including the T square, set square, protractor, and the comprehensive engineering drawing set, each serving specific functions in creating accurate drawings. It also detailed the various drawing materials such as different types of drawing papers, masking tape, clips, drawing boards, and clutch pencils, explaining their roles in supporting the drawing process. The correct use of these tools and materials was emphasized to ensure precision and quality in technical drawings. Additionally, the chapter highlighted important maintenance practices to preserve the condition and accuracy of drawing equipment, ensuring longevity and consistent performance. Understanding how to properly handle and care for these tools is crucial for producing professional technical drawings. Overall, the chapter provided a thorough foundation for selecting, using, and maintaining the tools and materials essential in technical drawing.

Self-Assessment

🔒 PDFDownload this self-assessment, with answers

A. Written Assessment

  1. What is the primary function of a T square in technical drawing? (2 marks)
  2. Identify two main types of set squares used in technical drawing. (2 marks)
🔒20 more in this section.

Chapter Examination Questions

🔒 PDFDownload these examination questions, with worked answers

SECTION A (40 Marks) - Answer ALL Questions

  1. Identify FOUR main parts of a T square and explain their function in technical drawing. (4 marks)
  2. Describe how a set square is used to draw perpendicular and angled lines on a drawing sheet. (4 marks)
🔒26 more in this section.

Chapter Practical Activities

Practical 1: Identify and select drawing equipment from an engineering drawing set

Welding Technology · Level 5
Technical Drawing
PRACTICAL ASSESSMENT
TIME: 3 HOURS
⬇ PDFCandidate Instructions (Candidate Tool)

Type: Individual

INSTRUCTIONS TO CANDIDATE:
1.  You are required to perform the following task:
i.  Identify and select appropriate drawing equipment for preparing a technical drawing of a 3000mm x 300mm x 300mm reinforced concrete beam.
2.  You have been provided with the following resources for the practical task:
Tools & EquipmentMaterials
Drawing boardTracing paper
T-square
Set square 45°
Set square 60°
Protractor
Divider
Compass
Pencils (HB, 2H, 4H)
Eraser
Sharpener
Scale ruler (metric)
Engineering drawing set box
Tracing paper
⬇ PDFResources Required (Cutting List)
S/NItemQuantity
1Drawing board1 Pc per Candidate
2T-square1 Pc per Candidate
3Set square 45°1 Pc per Candidate
4Set square 60°1 Pc per Candidate
5Protractor1 Pc per Candidate
6Divider1 Pc per Candidate
7Compass1 Pc per Candidate
8Pencils (HB, 2H, 4H)1 set per Candidate
9Eraser1 Pc per Candidate
10Sharpener1 Pc per Candidate
11Scale ruler (metric)1 Pc per Candidate
12Engineering drawing set box1 Pc per Candidate
13Tracing paper5 sheets per Candidate
⬇ PDFAssessor Guide
Items to be EvaluatedMarks AvailableMarks ObtainedComments
TASK 1: Adherence to safety and PPE use
Wore overall/dust coat correctly
(Award 1 or 0 mark)
1
Used pencil and sharpener safely
(Award 1 or 0 mark)
1
Handled drawing tools carefully to avoid injury
(Award 1 or 0 mark)
1
Sub-Total3
TASK 2: Identification and selection of drawing equipment
Selected correct drawing board suitable for beam drawing
(Award 1 or 0 mark)
1
Selected T-square for horizontal lines
(Award 1 or 0 mark)
1
Selected 45° and 60° set squares for angled lines
(Award 1 or 0 mark)
1
Selected protractor for measuring and drawing angles
(Award 1 or 0 mark)
1
Selected divider and compass for arcs and measurements
(Award 1 or 0 mark)
1
Selected appropriate pencils (HB, 2H, 4H) for different line types
(Award 1 or 0 mark)
1
Selected eraser and sharpener for corrections and clean lines
(Award 1 or 0 mark)
1
Selected scale ruler for accurate measurement and scaling
(Award 1 or 0 mark)
1
Selected tracing paper for overlay and final drawing
(Award 1 or 0 mark)
1
Sub-Total9
PRODUCT CHECKLIST
Correct selection of all required drawing equipment as per engineering drawing set
(Award 1 mark for each correct item selected or zero)
8
Equipment is in good working condition and suitable for drawing a 3000mm x 300mm x 300mm beam
(Award 2 marks each for condition and suitability or zero)
4
Sub-Total12
GRAND TOTAL24
ASSESSMENT OUTCOME:   ☐ Competent    ☐ Not Yet Competent (competent if at least 50%)

Practical 2: Use and Adjust a T Square on a Drawing Board

Welding Technology · Level 5
Technical Drawing
PRACTICAL ASSESSMENT
TIME: 4 HOURS
⬇ PDFCandidate Instructions (Candidate Tool)

Type: Individual

INSTRUCTIONS TO CANDIDATE:
1.  You are required to perform the following task:
i.  Set up and adjust a T square on a 600 mm x 450 mm drawing board to draw a horizontal line exactly 100 mm from the board’s edge.
2.  You have been provided with the following resources for the practical task:
Tools & EquipmentMaterials
Drawing board 600 mm x 450 mm
T square 600 mm blade length
Mechanical pencil 0.5 mm
Eraser
Set square 45°/60°
Drafting tape
Steel rule 300 mm
Dust cloth
Overall (PPE)
⬇ PDFResources Required (Cutting List)
S/NItemQuantity
1Drawing board 600 mm x 450 mm1 Pc per Candidate
2T square 600 mm blade length1 Pc per Candidate
3Mechanical pencil 0.5 mm1 Pc per Candidate
4Eraser1 Pc per Candidate
5Set square 45°/60°1 Pc per Candidate
6Drafting tape1 roll per 5 Candidates
7Steel rule 300 mm1 Pc per Candidate
8Dust cloth1 Pc per Candidate
9Overall (PPE)1 Pc per Candidate
⬇ PDFAssessor Guide
Items to be EvaluatedMarks AvailableMarks ObtainedComments
TASK 1: Use and Adjustment of T Square
Wore overall PPE correctly
(Award 1 or 0 mark)
1
Cleaned the drawing board surface before use
(Award 1 or 0 mark)
1
Placed the T square correctly against the edge of the drawing board
(Award 1 mark for correct positioning, 1 mark for firm placement)
2
Adjusted the T square to ensure it is square to the board edge
(Award 2 marks for correct adjustment and alignment)
2
Used steel rule to measure 100 mm from the board edge accurately
(Award 2 marks for correct measurement)
2
Drew a horizontal line using the T square and mechanical pencil at the 100 mm mark
(Award 3 marks for neat, straight line with correct length)
3
Cleaned the drawing board and returned tools after use
(Award 1 or 0 mark)
1
Handled drawing tools carefully to avoid damage
(Award 1 or 0 mark)
1
Sub-Total13
PRODUCT CHECKLIST
Horizontal line drawn at exactly 100 mm ±1 mm from the edge of the drawing board
(Award 5 marks for line within tolerance, 0 if out of tolerance)
5
Line is straight, clean, and drawn using the T square correctly
(Award 5 marks for straight, neat line without smudges)
5
T square is adjusted and positioned squarely with the drawing board edge
(Award 4 marks for correct adjustment and firm placement)
4
Sub-Total14
GRAND TOTAL27
ASSESSMENT OUTCOME:   ☐ Competent    ☐ Not Yet Competent (competent if at least 50%)
🔒

Free: practical guides, quick cards, workplace scenarios and more.

Create a free account
🔒Use set square to draw precise angles on drawing paperPractical 3
🔒Measure and draw specified angles using a protractorPractical 4
🔒Prepare and set up drawing board with drawing paperPractical 5
🔒Select and prepare drawing papers for technical drawingPractical 6
🔒Use and maintenance of clutch pencils for technical drawingPractical 7
🔒Maintenance of Technical Drawing EquipmentPractical 8
🔒Set out and draw a geometric figure using T square and set squarePractical 9
🔒Draw a Multi-Angle Layout Using Protractor and Set SquarePractical 10
🔒Secure drawing paper on board using masking tape and clips for precision workPractical 11
🔒Complete a technical drawing of a rectangular beam using full engineering drawing setPractical 12
Flashcards 20 cards Study deck ▾
Question
1

↻ Tap card to reveal answer
🔒

18 more in this section.

Create a free account
Test Yourself 20 questions Start quiz ▾
0%
0 / 2
🔒

18 more in this section.

Create a free account
Am I competent?

At the start of this chapter we promised you would be able to:

  • Identify and gather all the drawing equipment needed for your technical drawing tasks.
  • Identify and collect the appropriate drawing materials required to complete your work.
  • Use the drawing equipment correctly and safely according to the specific task at hand.

Tick each one you can genuinely do.

So, are you there yet?

You're competent when you can confidently do 50% or more of what this chapter promised.

Sign in to record how you're doing.