
By the end of this chapter, you will be able to:
Mastering these skills will help you assemble repaired equipment and appliances confidently and ensure they work safely and reliably in real-world settings.
Assembling repaired electrical and electronic equipment and appliances is a critical stage that ensures the restored device functions safely and efficiently. In Kenya's electronics engineering sector, technicians must apply precise mechanical and electrical assembly techniques to uphold product reliability and user safety. Proper assembly also affects the lifespan of the equipment and customer satisfaction, especially in service centers handling devices ranging from medical monitors to industrial controllers. This chapter addresses essential assembly practices, focusing on tightening screws and understanding connectors, both fundamental to securing components and enabling reliable electrical connections.
Tightening screws properly is a fundamental mechanical skill in electronics assembly. In Kenyan electronics repair workshops, such as those servicing medical devices at county hospitals or communication equipment in banks, correctly tightened screws prevent mechanical failure and intermittent electrical faults caused by loose connections. Over-tightening can damage plastic casings or strip threads, while under-tightening risks component loosening during operation or transport. Understanding the appropriate torque, screw types, and tools is essential for professional quality assembly.
Correct screw tightening ensures mechanical stability, electrical continuity, and safety of the assembled equipment. Loose screws can cause vibrations that lead to poor electrical contact or short circuits, which can be hazardous in sensitive devices like hospital monitors. Proper torque application prevents damage to delicate circuit boards and plastic parts common in electronics appliances. Additionally, correct tightening maintains warranty conditions for many imported electronics repaired in Kenyan service centers.
Different screw types are used depending on the material, load, and accessibility in electronics devices repaired in Kenya. Common screw types include machine screws, self-tapping screws, and captive screws, each serving distinct functions in securing metal chassis, plastic covers, or circuit boards.
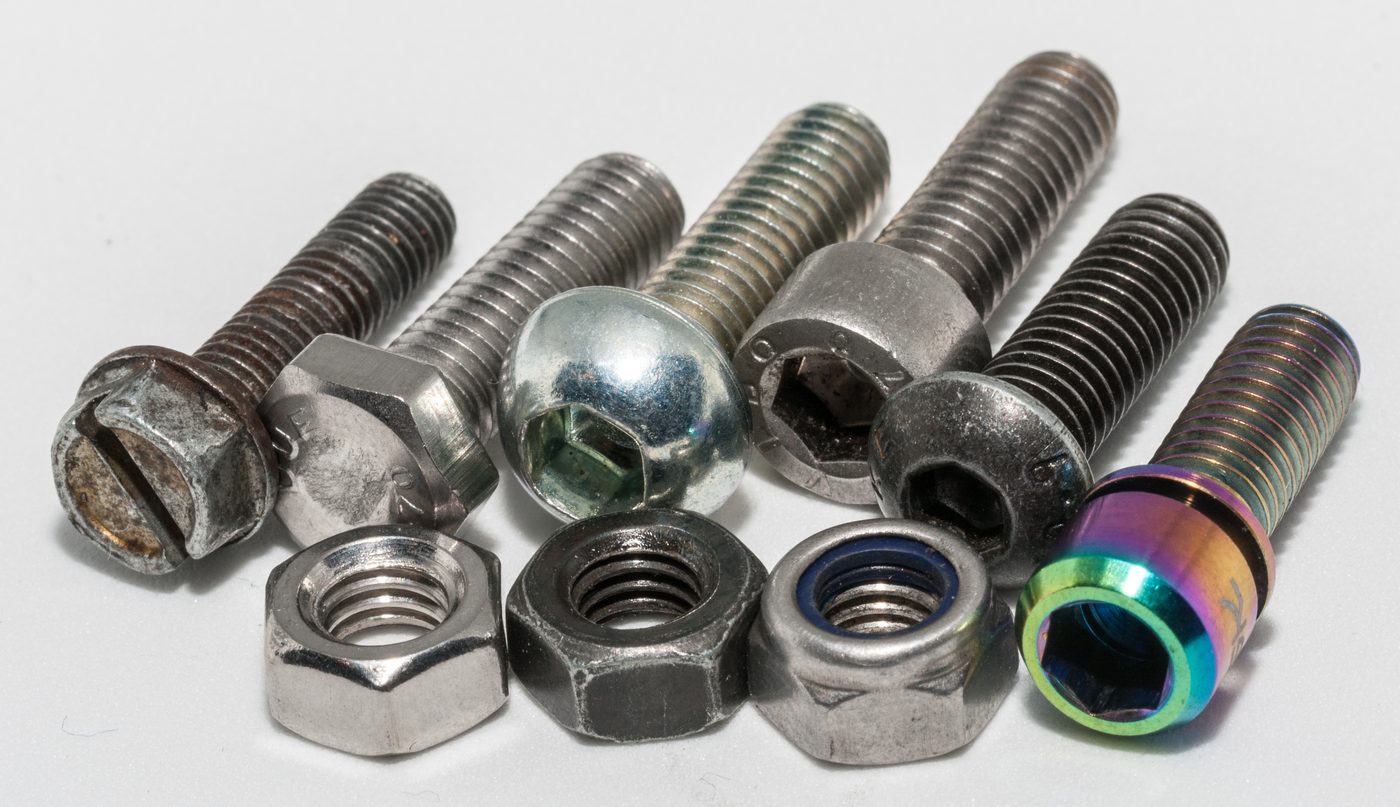
Various machine screws with nuts (Source: Wikimedia Commons)
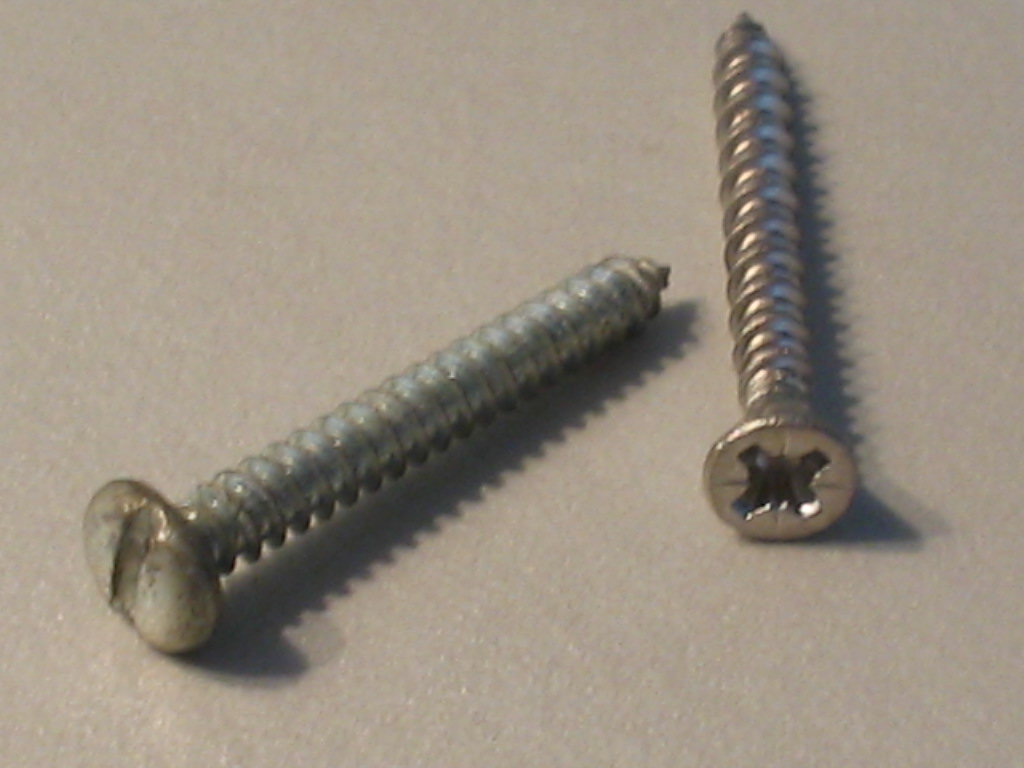
Two self-tapping screws on a surface (Source: Wikipedia (Self-tapping screw))
Captive screws: Designed to remain attached to a panel or cover even when loosened, preventing loss during maintenance in hospital equipment.
Pan head screws: Provide a large bearing surface for fastening plastic parts without cracking.
Using the right tools and techniques is crucial for applying correct torque without damaging components. Kenyan electronics technicians use precision screwdrivers, torque drivers, and occasionally power tools for repetitive tasks.
Precision screwdrivers: Allow controlled force application in tight spaces, essential for circuit boards and small appliances.
Torque screwdrivers: Calibrated to apply specific torque values, preventing over or under-tightening in sensitive repairs.
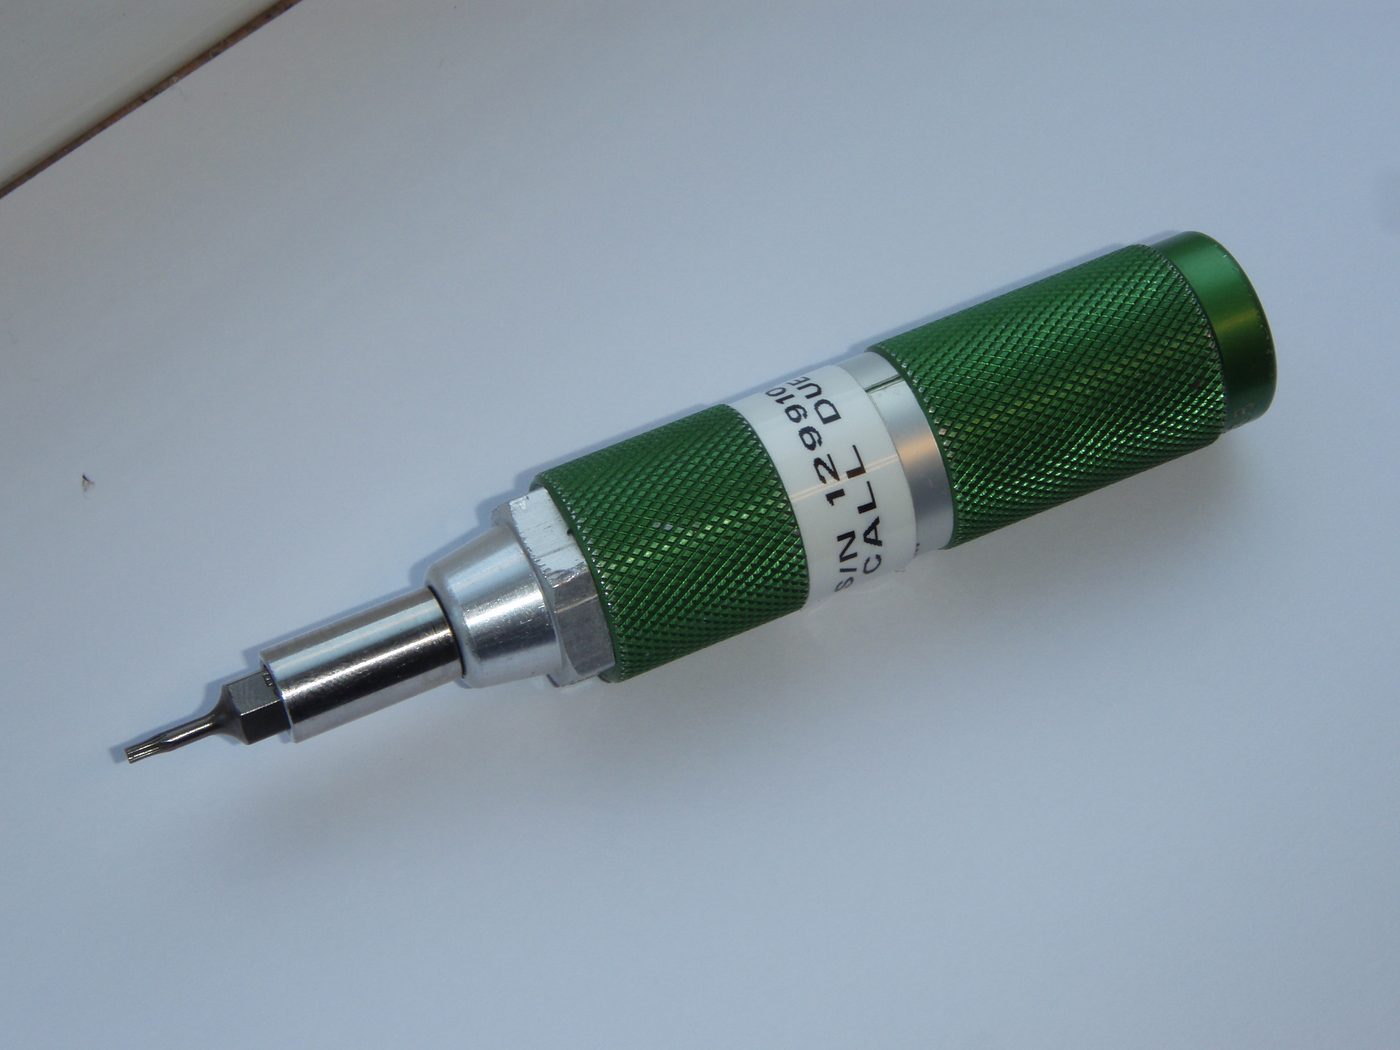
Green torque screwdriver for precise tightening (Source: Wikipedia (Torque screwdriver))
Incorrect screw tightening can cause equipment failure, safety hazards, and increased repair costs. Kenyan repair technicians must be aware of these risks to maintain professional standards.
Create a free account to open more of this chapter.
Free: practical guides, quick cards, workplace scenarios and more.
Create a free accountThis chapter focused on the critical steps involved in assembling repaired electrical and electronic equipment and appliances. It began with the importance of properly tightening screws to ensure secure and stable connections, which prevents mechanical failures and maintains safety. The discussion then covered connectors, highlighting various types and their roles in establishing reliable electrical connections within devices. The use of cable ties, silicon glue, super glue, and insulating tapes was examined as essential materials for organizing, securing, and protecting wiring and components during reassembly. Finally, the chapter addressed the mounting of cooling components, emphasizing correct placement and attachment to ensure efficient heat dissipation and prevent overheating. Mastery of these assembly techniques is vital for restoring functionality and prolonging the lifespan of repaired equipment.
Type: Individual
| Tools & Equipment | Materials |
|---|---|
| Electric screwdriver | Assorted screws (M3, M4, M5 sizes) |
| Set of screwdrivers (flathead and Phillips) | Electrical appliance casing parts (plastic and metal panels) |
| Torque screwdriver | Component mounting brackets |
| Cleaning cloth |
| S/N | Item | Quantity |
|---|---|---|
| 1 | Electric screwdriver | 1 Pc per Candidate |
| 2 | Set of screwdrivers (flathead and Phillips) | 1 Set per Candidate |
| 3 | Torque screwdriver (0.5-3 Nm range) | 1 Pc per Candidate |
| 4 | Assorted screws (M3, M4, M5 sizes) | 20 Pcs per Candidate |
| 5 | Electrical appliance casing parts (plastic and metal panels) | 1 Set per Candidate |
| 6 | Component mounting brackets | 1 Set per Candidate |
| 7 | Personal Protective Equipment (dust coat, safety gloves) | 1 Set per Candidate |
| 8 | Cleaning cloth | 1 Pc per Candidate |
| Items to be Evaluated | Marks Available | Marks Obtained | Comments |
|---|---|---|---|
| TASK 1: Tightening screws during appliance assembly | |||
| Wore Personal Protective Equipment (dust coat and safety gloves) (Award 1 if worn correctly before starting work, else 0) | 1 | ||
| Ensured clean and organized working area before starting (Award 1 if workspace is tidy and free from hazards, else 0) | 1 | ||
| Identified and selected correct screw sizes (M3, M4, M5) for specific components (Award 1 mark each for correctly identifying 2 screw sizes used) | 2 | ||
| Used appropriate screwdriver types (flathead or Phillips) matching screw heads (Award 1 mark each for correct use of flathead and Phillips screwdrivers) | 2 | ||
| Applied correct torque using torque screwdriver within 1.0 to 1.5 Nm range for screws (Award full marks if torque applied is within specified range for all screws, else 0) | 3 | ||
| Tightened screws to secure casing panels and mounting brackets firmly without damage (Award full marks if screws are tight, components fixed firmly, no stripping or damage) | 3 | ||
| Checked all screws for proper fit and absence of gaps between casing parts (Award 2 if all screws checked and fit is flush, else 0) | 2 | ||
| Cleaned assembled appliance surface to remove dirt or fingerprints after tightening (Award 1 if cleaning is done properly, else 0) | 1 | ||
| Sub-Total | 15 | ||
| PRODUCT CHECKLIST | |||
| Assembled appliance casing dimensions checked: length 300mm ±5mm, width 200mm ±5mm, height 150mm ±5mm (Award 4 if all dimensions within tolerance, else 0) | 4 | ||
| Screws correctly tightened with no loose or over-tightened screws (Award 4 if all screws are properly tightened without damage, else 0) | 4 | ||
| Casing panels and mounting brackets are firmly secured and aligned without gaps or misfits (Award 3 if firm and aligned, else 0) | 3 | ||
| Sub-Total | 11 | ||
| GRAND TOTAL | 26 | ||
Type: Individual
| Tools & Equipment | Materials |
|---|---|
| Multimeter | Insulated crimp connectors (ring, spade, butt) |
| Wire stripper and cutter | Solder sleeve connectors |
| Crimping tool | Heat shrink tubing assorted sizes |
| Soldering iron with solder wire | Electrical wires 1.5 mm2 red, black, blue |
| Heat gun | Personal Protective Equipment (dust coat, gloves, safety glasses) |
| S/N | Item | Quantity |
|---|---|---|
| 1 | Insulated crimp connectors (ring, spade, butt) | 5 pcs per Candidate |
| 2 | Solder sleeve connectors | 5 pcs per Candidate |
| 3 | Heat shrink tubing assorted sizes | 1 meter per Candidate |
| 4 | Electrical wires 1.5 mm2 red, black, blue | 3 meters per Candidate |
| 5 | Multimeter | 1 pc per Candidate |
| 6 | Wire stripper and cutter | 1 pc per Candidate |
| 7 | Crimping tool | 1 pc per Candidate |
| 8 | Soldering iron with solder wire | 1 set per 3 Candidates |
| 9 | Heat gun | 1 pc per 5 Candidates |
| 10 | Personal Protective Equipment (dust coat, gloves, safety glasses) | 1 set per Candidate |
| Items to be Evaluated | Marks Available | Marks Obtained | Comments |
|---|---|---|---|
| TASK 1: Preparation and Safety | |||
| Wore Personal Protective Equipment (dust coat, gloves, safety glasses) (Award 1 or 0) | 1 | ||
| Ensured clean and organized working area before starting work (Award 1 or 0) | 1 | ||
| Sub-Total | 2 | ||
| TASK 2: Identification and Selection of Connectors | |||
| Correctly identified insulated crimp connectors (ring, spade, butt) (Award 1 mark for each correct type identified, max 3) | 3 | ||
| Correctly identified solder sleeve connectors (Award 1 or 0) | 1 | ||
| Sub-Total | 4 | ||
| TASK 3: Wire Preparation and Connector Application | |||
| Stripped wires to correct length without damaging conductors (Award 2 or 0) | 2 | ||
| Applied correct crimp connectors firmly using crimping tool (Award 3 or 0) | 3 | ||
| Soldered connections using solder sleeve connectors with neat joints (Award 4 or 0) | 4 | ||
| Applied heat shrink tubing correctly using heat gun (Award 2 or 0) | 2 | ||
| Sub-Total | 11 | ||
| TASK 4: Wiring Assembly and Testing | |||
| Connected wires and components according to wiring layout (Award 4 or 0) | 4 | ||
| Ensured all connections are secure and insulated (Award 3 or 0) | 3 | ||
| Tested continuity and correct polarity using multimeter (Award 4 or 0) | 4 | ||
| Sub-Total | 11 | ||
| PRODUCT CHECKLIST | |||
| Wiring panel assembled 300mm x 200mm with neat layout and secure connectors (Award 3 or 0) | 3 | ||
| All connectors correctly selected and applied as per wiring layout (Award 4 or 0) | 4 | ||
| No exposed wires or poor insulation visible (Award 3 or 0) | 3 | ||
| Sub-Total | 10 | ||
| GRAND TOTAL | 38 | ||
At the start of this chapter we promised you would be able to:
Tick each one you can genuinely do.
So, are you there yet?
You're competent when you can confidently do 50% or more of what this chapter promised.
Sign in to record how you're doing.