Electronics Engineering  ·  Level 6
Electrical And Electronic Equipment And Appliance Repairs
Chapter 2: Inspect and test electrical and electronic equipment and appliances
📚 7 Topics
⚑ What you will be able to do

By the end of this chapter, you will be able to:

  • Safely disassemble electrical and electronic equipment and appliances using the manufacturer’s manuals.
  • Correctly sort screws according to standard operating procedures.

Mastering these skills helps you work efficiently and safely, ensuring quality repairs in the electrical trade.

Inspection and testing of electrical and electronic equipment and appliances form a critical foundation in electronics engineering repair and maintenance. This chapter focuses on the practical skills required to disassemble a variety of common devices encountered in Kenya’s service and industrial sectors. Mastery of disassembly techniques is essential for accurate fault diagnosis, component replacement, and ensuring safe and effective repairs in institutions such as hospitals, universities, and retail businesses. The diverse range of equipment covered reflects the broad scope of electronics engineering professionals’ responsibilities across the country.

2.1 Disassembling of various equipment and appliances

Disassembly is the initial step in servicing electrical and electronic equipment. It requires a clear understanding of each device’s construction and internal layout to avoid damage and to facilitate efficient repair. In Kenya, technicians encounter a wide variety of appliances from local markets and international brands, necessitating adaptable skills to handle different designs safely and effectively.

2.1.1 Radio

Radios remain widely used in Kenya, particularly in rural areas and small businesses, making their repair a common task for electronics engineers.

Internal Components and Layout

Radios typically consist of a plastic or metal casing housing the tuner, amplifier, speaker, power supply, and control knobs. Understanding the layout helps avoid damage when removing the casing and accessing circuit boards.

  • Tuner Unit: Responsible for selecting the radio frequency; delicate and requires careful handling.

  • Amplifier Section: Amplifies the audio signal; often includes transistors or ICs.

  • Speaker: Usually fixed to the casing; detaching requires unscrewing or unclipping.

  • Power Supply: Battery compartment or AC adapter input; critical to disconnect before disassembly.

  • Control Interface: Includes volume and tuning knobs; removal may involve unscrewing or unclipping.

Tools and Techniques for Safe Disassembly

Proper tools such as precision screwdrivers, plastic prying tools, and tweezers prevent damage to fragile parts.

  • Screwdrivers: Use the correct size to avoid stripping screws.

Red-handled screwdriver on a rock outdoors
Red-handled screwdriver on a rock outdoors (Source: Wikimedia Commons)

  • Prying Tools: Essential for opening snap-fitted cases without cracking plastic.

  • Tweezers: Useful for handling small components and connectors.
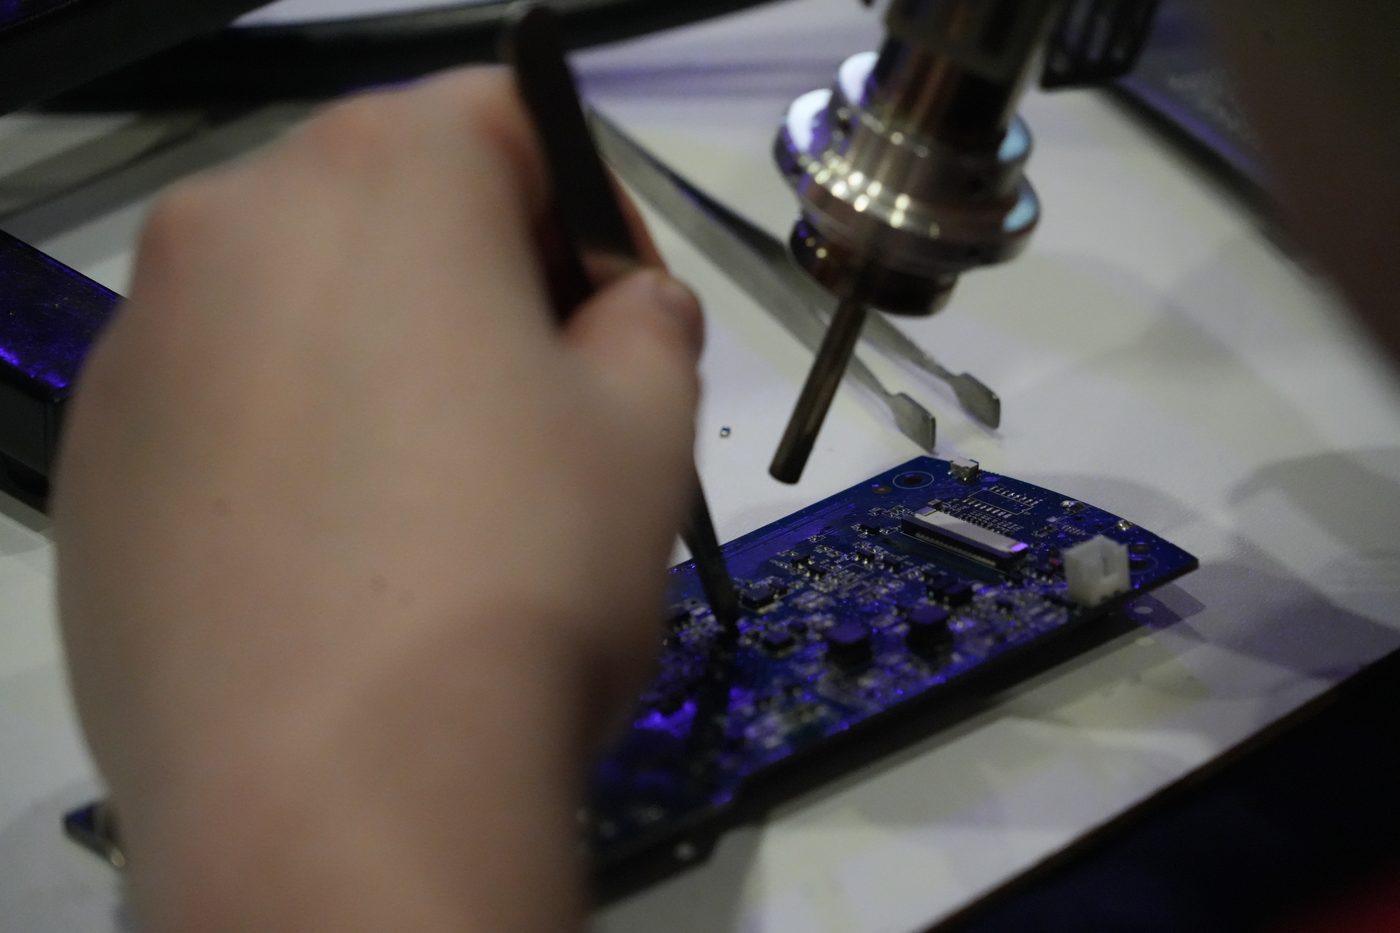
Hand holding tweezers near electronic circuit board
Hand holding tweezers near electronic circuit board (Source: Wikimedia Commons)

  • Static Precautions: Use anti-static wrist straps to protect sensitive electronics.
  • Documentation: Photograph or note component positions for accurate reassembly.

Common Challenges and Solutions

Radios often have tightly fitted parts and fragile wiring, which can be damaged if force is applied.

  • Tight Screws: Apply penetrating oil or use screw extractors if screws are corroded.
  • Fragile Wires: Label wires before disconnecting to ensure correct reconnection.
  • Plastic Clips: Use gentle prying to avoid breaking clips securing the casing.
  • Corrosion: Inspect terminals and clean contacts carefully with isopropyl alcohol.
  • Component Identification: Refer to circuit diagrams to avoid removing critical parts unnecessarily.

2.1.2 Television

Televisions are complex devices combining electronic circuits and mechanical assemblies, requiring careful disassembly especially in repair centers servicing urban and rural clients.

Structural Overview and Component Access

Modern TVs may be LED, LCD, or plasma, each with unique construction but generally comprising a front panel, back cover, circuit boards, and power supply.

  • Front Panel: Includes display screen and protective glass; removal involves unscrewing bezel and disconnecting ribbon cables.
  • Back Cover: Houses main circuit boards and power supply; often secured with screws.
  • Circuit Boards: Mainboard, T-con board, power board; careful handling is necessary to avoid damage.
  • Connectors and Cables: Ribbon cables and wire harnesses connect boards; disconnect carefully.
  • Cooling Components: Heat sinks and fans may be present; ensure no damage during disassembly.

Procedures for Disassembling a Television

Disassembly requires systematic steps to prevent damage to the screen and sensitive electronics.

  1. Unplug and Discharge: Disconnect power and allow capacitors to discharge.
  2. Remove Back Cover Screws: Use appropriate screwdrivers.
  3. Detach Connectors: Carefully unplug cables with minimal force.
  4. Remove Circuit Boards: Unscrew and handle boards by edges.
  5. Access Screen Assembly: If needed, unscrew bezel and remove protective layers.
  6. Store Components Safely: Place screws and parts in labelled containers.

Safety Considerations and Handling Tips

Televisions contain high-voltage components and fragile screens.

  • Electrostatic Discharge (ESD): Use grounding straps.
  • High Voltage: Avoid touching the power supply capacitors immediately after unplugging.
  • Screen Handling: Avoid pressure on the display panel to prevent cracks.
  • Sharp Edges: Use gloves to handle metal chassis parts.
  • Workspace Organization: Keep a clean, static-free area to prevent damage.

2.1.3 Refrigerators

Refrigerators combine electrical components with mechanical refrigeration systems, making their disassembly a multidisciplinary task.

Basic Construction and Key Components

Refrigerators include the compressor, condenser coils, thermostat, evaporator, and electronic control boards.

  • Compressor: Located at the back; heavy and requires care when handling.

  • Condenser Coils: Usually at the rear or underneath; careful not to bend or damage.

  • Thermostat: Controls temperature; often accessible inside the fridge.
  • Evaporator: Inside the freezer compartment; delicate fins can be damaged.
  • Electronic Controls: Circuit boards managing defrost and temperature regulation.

Disassembly Steps for Troubleshooting

Technicians must separate electrical parts from mechanical refrigeration components carefully.

  1. Unplug and Defrost: Ensure power is off and fridge is defrosted.
  2. Remove Outer Panels: Unscrew and detach back and side panels.
  3. Disconnect Wiring Harnesses: Label all connectors before removal.
  4. Extract Compressor and Coils: Only if necessary, using proper lifting techniques.
  5. Access Control Boards: Usually inside a control box; unscrew and inspect.
  6. Inspect Seals and Insulation: Remove door seals gently for replacement or repair.

Handling Refrigerants and Environmental Precautions

Kenya’s environmental regulations require safe handling of refrigerants during repairs.

  • Refrigerant Recovery: Use certified equipment to recover gases before compressor removal.
  • Avoid Leaks: Check for leaks and repair using approved sealants.
  • Waste Disposal: Dispose of damaged parts in compliance with NEMA guidelines.
  • Personal Protective Equipment: Wear gloves and goggles when handling refrigerants.
  • Training Requirements: Only certified technicians should handle refrigerants.

2.1.4 Electric Kettles

Electric kettles are compact household appliances commonly repaired in electronics workshops.

Component Identification and Layout

Typical kettles consist of a heating element, thermostat, power cord, and casing.
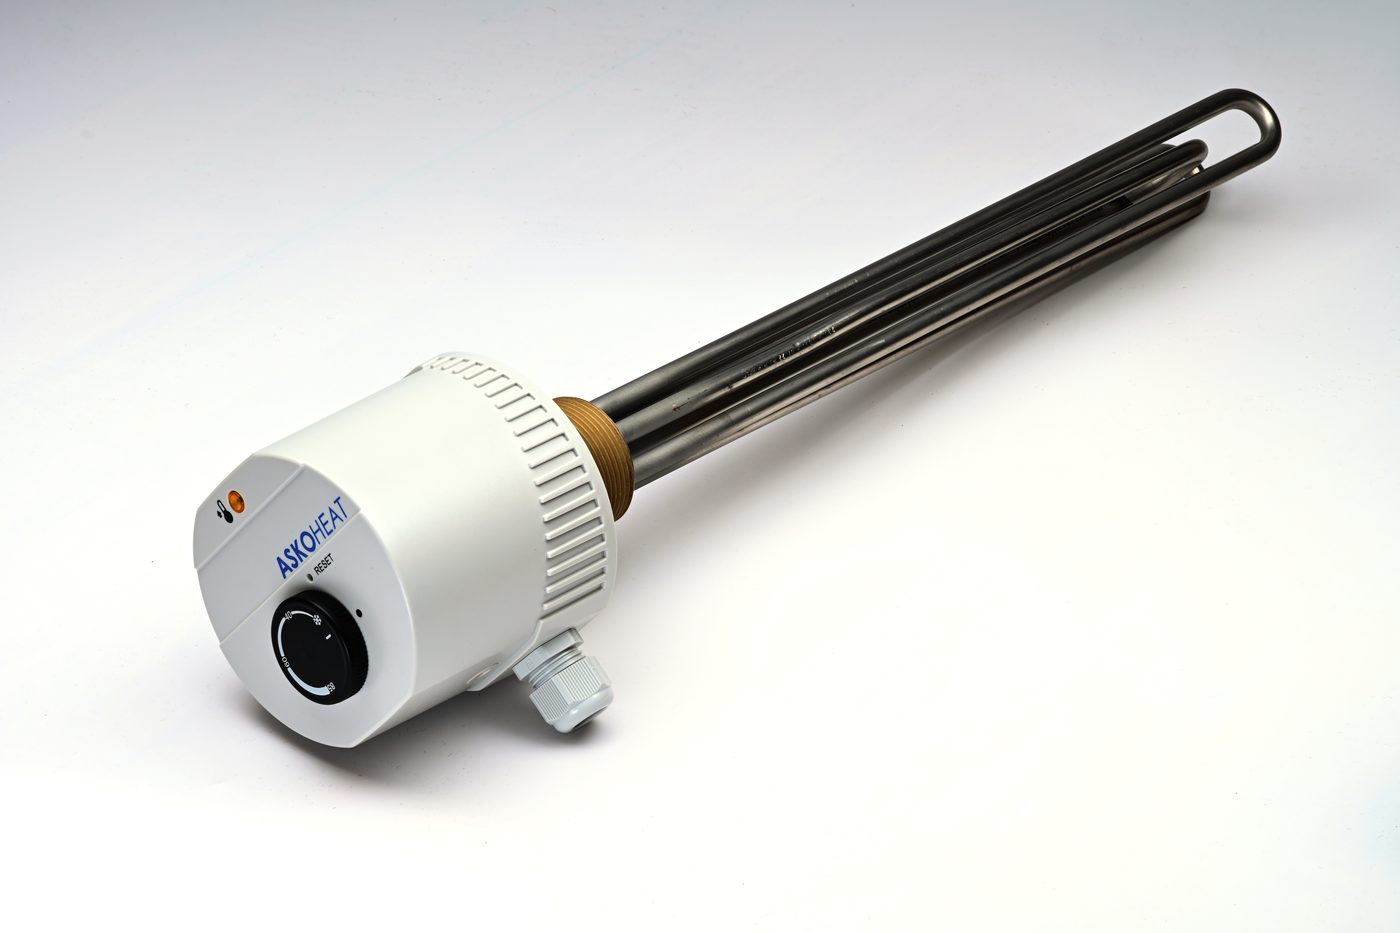
  • Heating Element: Usually concealed at the base; converts electrical energy to heat.

Electric heating element with thermostat control
Electric heating element with thermostat control (Source: Wikimedia Commons)

  • Thermostat: Regulates temperature and prevents overheating.
  • Power Cord and Plug: Supplies electricity; may include safety fuses.
  • Casing: Often plastic or metal; houses internal components.

  • Switch Mechanism: Activates heating; may be mechanical or electronic.

Disassembly Approach

Due to their small size, kettles require gentle handling and the right tools.

  • Unplug and Cool: Ensure the kettle is unplugged and cooled before disassembly.
  • Remove Base Plate: Unscrew or unclip the base to access internal parts.
  • Disconnect Heating Element: Carefully detach wiring and connectors.
  • Extract Thermostat: Unscrew or unclip the thermostat.
  • Inspect Switch: Remove switch assembly for testing or replacement.
  • Reassemble Carefully: Ensure seals and gaskets are intact to prevent leaks.

Common Faults and Inspection Points

Many kettle faults arise from heating element failure or thermostat malfunction.

  • Burnt Heating Element: Check continuity with a multimeter.
  • Faulty Thermostat: Test for proper switching at cut-off temperature.
  • Damaged Power Cord: Inspect for fraying or loose connections.
  • Switch Failure: Look for mechanical wear or corrosion.
  • Water Leakage: Inspect seals and base for cracks.

2.1.5 Instant Showers

Instant showers use electrical heating elements to provide hot water on demand, common in Kenyan households with limited hot water systems.

Design and Key Parts

Instant showers contain a heating element, water flow sensor, thermostat, and control unit.

  • Heating Element: Immersed in water; rapid heating.
  • Flow Sensor: Detects water flow to activate heating.

  • Thermostat: Controls water temperature.

  • Control Unit: Includes switches and safety cut-offs.
  • Water Inlet and Outlet: Plumbing connections integrated with electrical parts.

Disassembly Techniques

Disassembly must prevent water damage and ensure electrical safety.

  1. Switch Off Power and Water: Isolate electrical and water supplies.
  2. Remove Cover: Unscrew front panel carefully.
  3. Disconnect Wiring: Label and detach connectors.
  4. Remove Heating Element: Unscrew or unclip from housing.
  5. Extract Sensors and Switches: Remove for inspection.
  6. Inspect Seals and Gaskets: Check for water tightness.

Safety and Environmental Considerations

Electric showers pose risks if not handled correctly.

  • Electrical Isolation: Confirm power is off before work.
  • Water Contamination: Prevent water ingress into electrical parts.
  • Component Testing: Use insulation testers to check wiring integrity.
  • Disposal of Faulty Parts: Follow environmental regulations.
  • User Safety: Reassemble with all safety features intact.

2.1.6 Air Conditioning Systems

Air conditioning units combine electrical, electronic, and mechanical components requiring specialized disassembly knowledge.

Component Breakdown and Layout

Units include compressor, condenser, evaporator, electronic control board, fans, and sensors.

  • Compressor: The heart of the refrigeration cycle; heavy and electrically powered.
  • Condenser and Evaporator Coils: Facilitate heat exchange.
  • Control Board: Manages operation and safety features.
  • Fans: Circulate air; may have separate motors.
  • Sensors and Thermostats: Monitor temperature and pressure.

Disassembly Procedures for Repair

Disassembly varies between window, split, and portable units but follows general principles.

  1. Power Down and Disconnect: Ensure unit is unplugged.
  2. Remove Outer Panels: Unscrew case panels.
  3. Disconnect Refrigerant Lines (Certified Technicians Only): Recover refrigerant before disassembly.
  4. Remove Fans and Motors: Unscrew and disconnect wiring.
  5. Extract Control Boards: Handle with ESD precautions.
  6. Access Compressor: Remove mounting bolts carefully.

Handling Refrigerants and Safety Compliance

Strict adherence to environmental and safety standards is mandatory.

  • Refrigerant Recovery: Use certified equipment.
  • Personal Protective Equipment: Gloves, goggles, and masks.
  • Leak Detection: Use electronic leak detectors.
  • Waste Disposal: Follow NEMA guidelines.
  • Certification: Only qualified personnel should handle refrigerants.

2.1.7 Washing Machines

Washing machines integrate electrical controls with mechanical systems such as motors and pumps.

Internal Structure and Components

Common parts include control panel, motor, drum, water inlet valves, and electronic boards.

  • Control Panel: User interface with buttons and display.
  • Motor: Drives the drum; may be induction or universal motor.

  • Drum Assembly: Holds clothes and rotates.

  • Water Valves: Control water intake.
  • Electronic Control Board: Manages cycles and functions.

Steps for Disassembly

Disassembling requires separating electrical elements from mechanical parts.

  1. Unplug and Drain Water: Disconnect power and empty water.
  2. Remove Top and Back Panels: Unscrew and detach.
  3. Disconnect Wiring Harnesses: Label for reassembly.
  4. Extract Control Panel: Unscrew and disconnect.
  5. Remove Motor and Drum Assembly: Detach mounting bolts.
  6. Inspect Pumps and Valves: Remove for cleaning or replacement.

Common Disassembly Challenges

Washing machines are bulky with complex wiring; care is needed to avoid damage.

  • Heavy Parts: Use proper lifting techniques.
  • Wiring Complexity: Label all connectors before removal.
  • Water Residue: Ensure all water is drained to prevent spills.
  • Corroded Screws: Use penetrating oil for stubborn fasteners.
  • Plastic Clips: Handle gently to avoid breakage.

2.1.8 Mobile Phones

Mobile phones are compact, intricate devices requiring precision tools and steady hands for disassembly.

Internal Components and Layout

Phones include battery, motherboard, display assembly, cameras, and connectors.

  • Battery: Usually removable or fixed; requires care to avoid damage.

  • Motherboard: Houses processor and circuit chips.
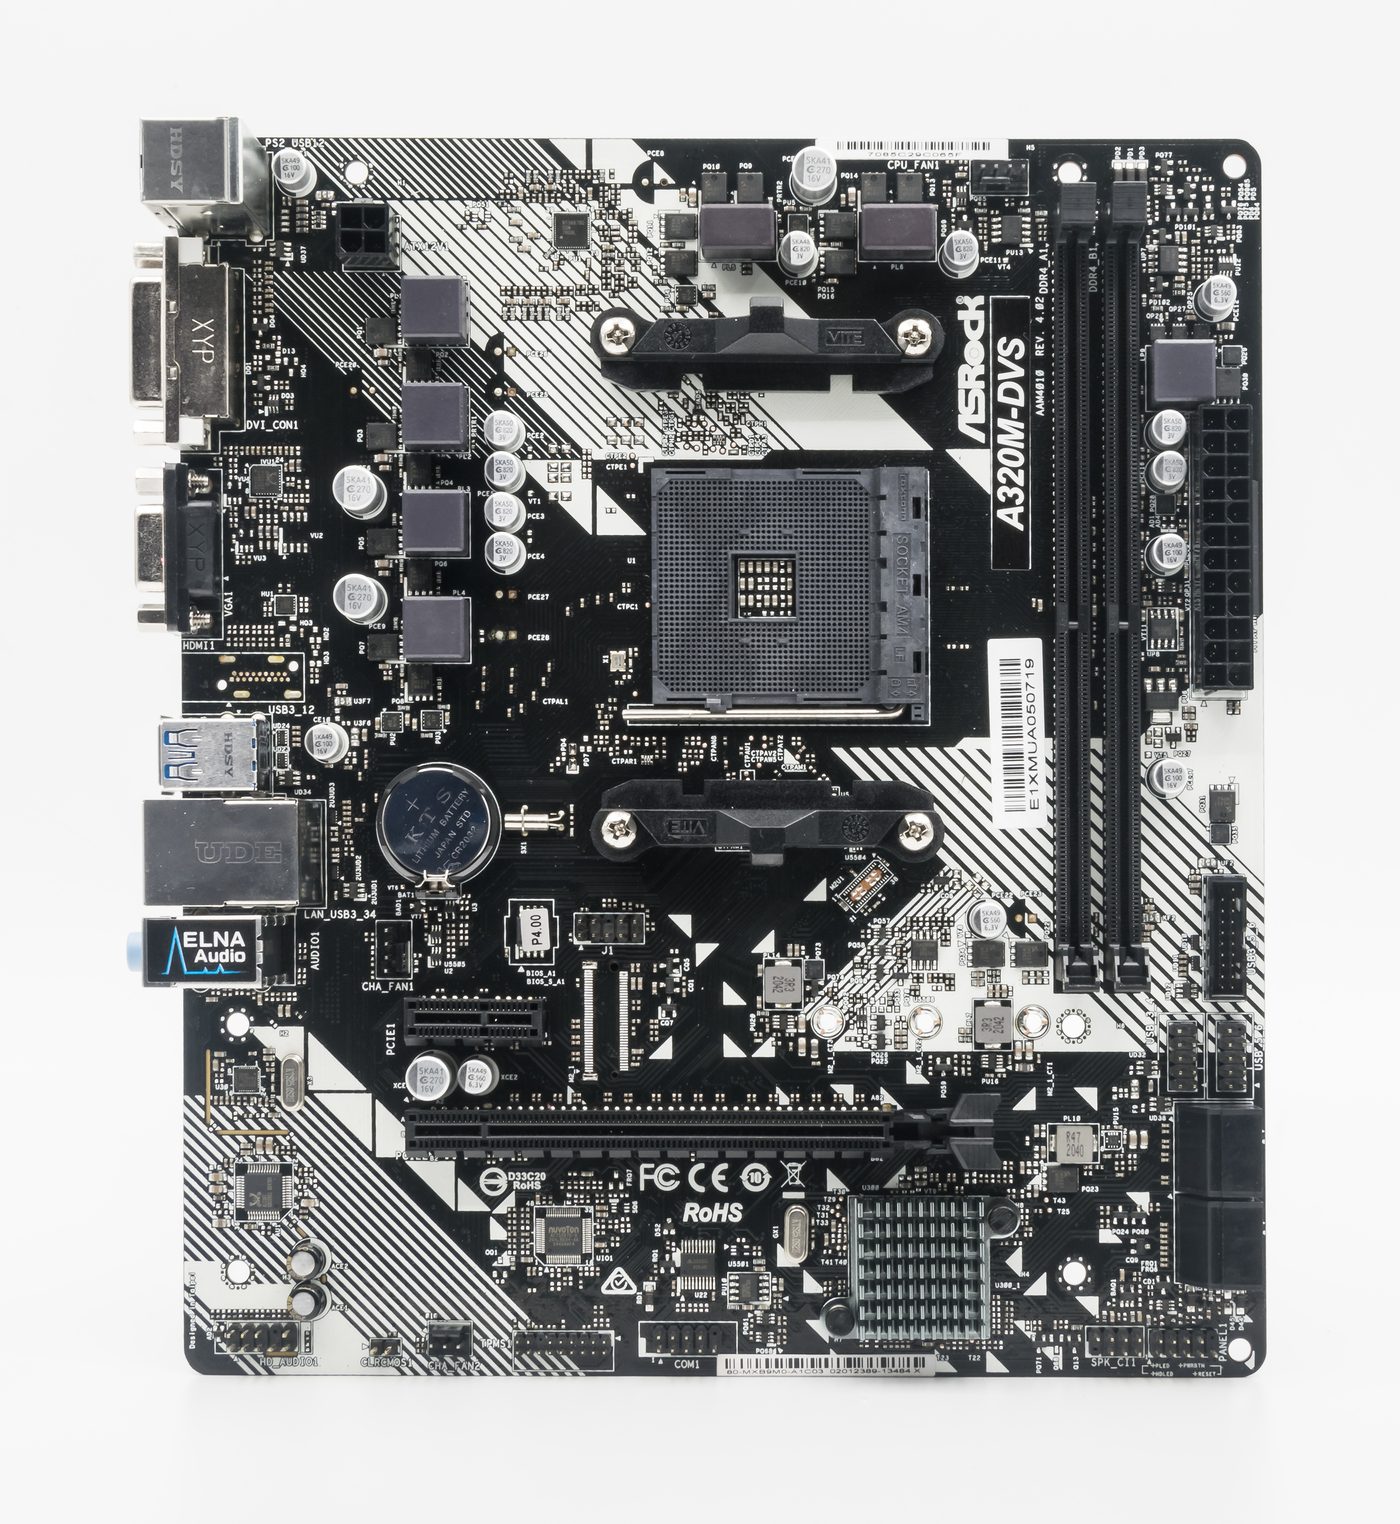
Computer motherboard ASRock A320M-DVS
Computer motherboard ASRock A320M-DVS (Source: Wikimedia Commons)

  • Display Assembly: Includes touchscreen and LCD/OLED panel.
  • Camera Modules: Small and delicate.
  • Connectors and Flex Cables: Connect components; fragile and easily torn.

Tools and Techniques for Disassembly

Precision tools and anti-static measures are essential.

Name Specification Use
Precision Screwdriver Set Sizes 0.8mm to 2.0mm, magnetic tips Remove small screws without damage
Plastic Pry Tools Non-conductive, thin edges Separate snap-fit parts without scratching
Tweezers Fine tip, anti-static Handle small parts and connectors
Suction Cups Diameter 2-3 cm Lift display assemblies safely
ESD Wrist Strap Adjustable, grounded Prevent static damage
  • Use gentle prying to separate display from frame.
  • Unscrew internal screws carefully and keep organized.
  • Detach flex cables by lifting connectors, never pulling cables.
  • Avoid bending or puncturing the battery.
  • Keep track of tiny screws using magnetic mats or trays.

Disassembly Challenges and Best Practices

Small components and delicate connectors make mobile phone disassembly challenging.

  • Fragile Screen: Handle with care to avoid cracks.
  • Battery Safety: Avoid puncturing or bending lithium-ion batteries.
  • Connector Damage: Use plastic tools to disconnect flex cables.
  • Screw Variability: Different screw types require matching drivers.
  • Reassembly Complexity: Document each step to ensure proper reassembly.

2.1.9 Iron Boxes

Electric iron boxes are simple appliances but contain heating elements and thermostats requiring careful disassembly.

Key Components and Construction

Main parts include heating plate, thermostat, power cord, and casing.
  • Heating Plate: Metal soleplate that heats up.
  • Thermostat: Controls temperature and prevents overheating.
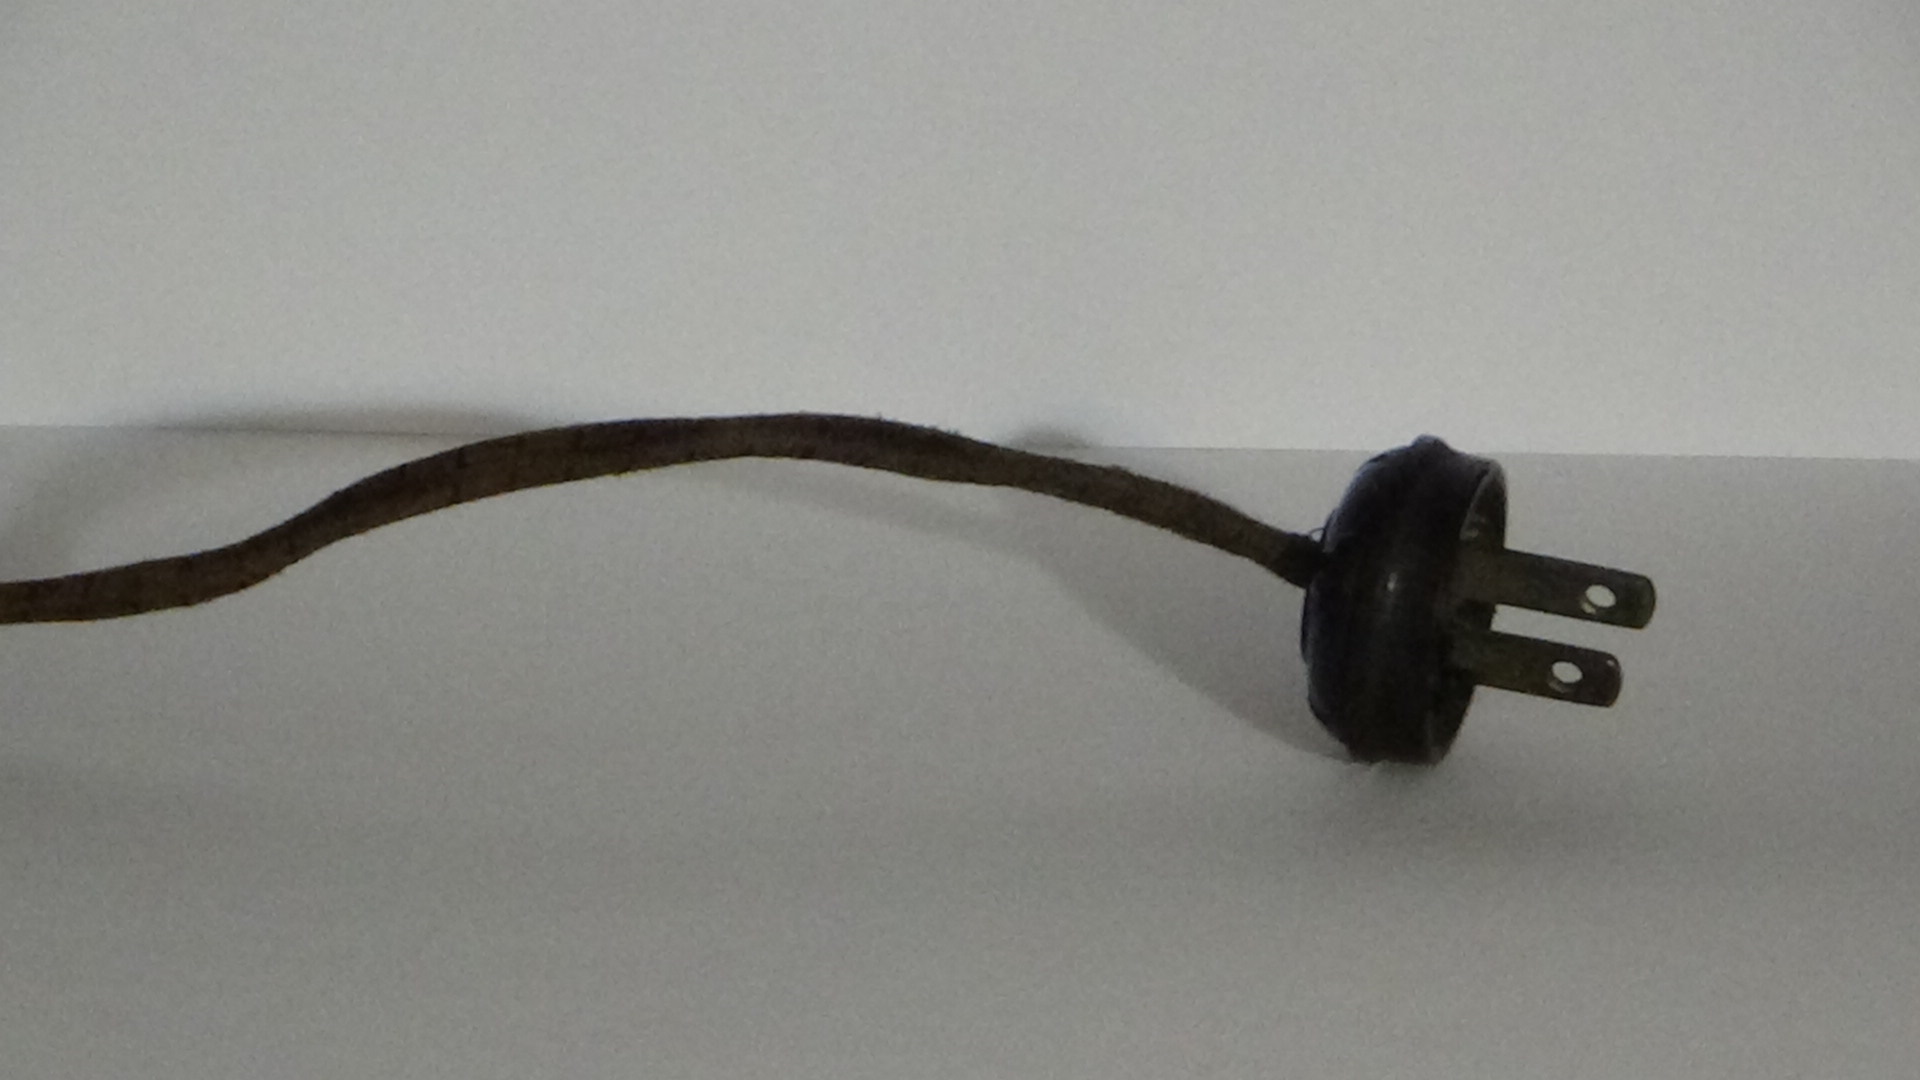
  • Power Cord: Supplies electricity; includes strain relief.

Old-style power cord with plug
Old-style power cord with plug (Source: Wikimedia Commons)

  • Casing: Usually plastic or metal.
  • Control Knob: Adjusts temperature settings.

Disassembly Process

The process involves accessing heating and control components.

  1. Unplug and Cool: Ensure iron is disconnected and cool.
  2. Remove Base Screws: Unscrew to open casing.
  3. Disconnect Power Cord: Detach wiring carefully.
  4. Remove Thermostat: Unscrew or unclip.
  5. Extract Heating Element: Detach from mounting.
  6. Inspect and Clean: Check for corrosion or damage.

Handling and Safety Considerations

Heating elements can retain heat and pose burn risks.

  • Ensure Complete Cooling: Wait sufficient time before handling.
  • Avoid Electrical Shock: Confirm power is off.
  • Component Fragility: Handle thermostat with care.
  • Use Insulated Tools: Avoid accidental shorts.
  • Clean Contacts: Use appropriate solvents for corrosion.

2.1.10 Set Top Boxes

Set top boxes decode television signals and have electronic circuit boards requiring careful handling during disassembly.

Internal Structure and Components

Includes mainboard, tuner module, power supply, and connectors.
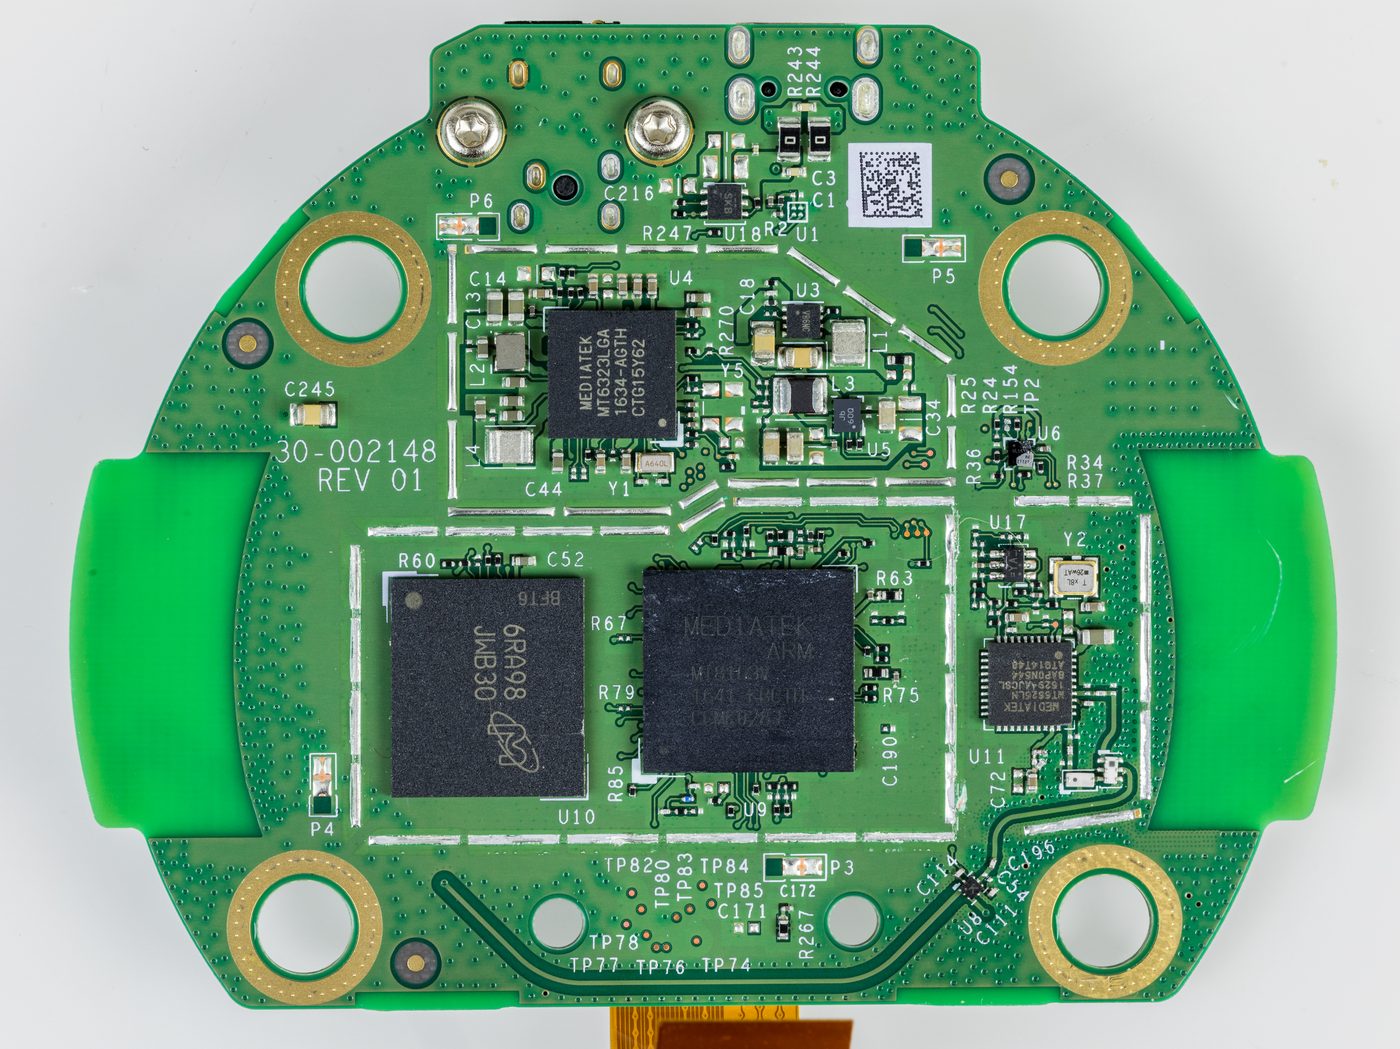
  • Mainboard: Contains processor and memory chips.

Electronics mainboard with integrated circuits
Electronics mainboard with integrated circuits (Source: Wikimedia Commons)

  • Tuner Module: Receives broadcast signals.
  • Power Supply: Converts AC to DC.
  • Interfaces: HDMI, USB, and antenna connectors.
  • Cooling Elements: Heat sinks or fans.

Disassembly Techniques

Set top boxes are compact with sensitive electronics.

  • Unplug Power: Ensure device is disconnected.
  • Remove Screws: Use appropriate screwdrivers.
  • Separate Case Halves: Use plastic pry tools to avoid damage.
  • Disconnect Connectors: Label cables before removal.
  • Remove Circuit Boards: Handle by edges.
  • Inspect for Damage: Look for burnt components or corrosion.

Common Issues During Disassembly

Fragile connectors and tight assembly can complicate repair.

  • Connector Breakage: Use gentle pressure when unplugging.
  • Static Damage: Use anti-static measures.
  • Small Screws: Organize carefully to avoid loss.
  • Plastic Clips: Avoid forcing open parts.
  • Dust and Debris: Clean internals carefully.

Practice Questions

  1. Describe the key safety precautions an electronics technician should observe when disassembling a television. (10 marks)
  2. Explain the step-by-step procedure for disassembling an electric kettle for repair purposes. (12 marks)
  3. List and explain five common challenges encountered when disassembling mobile phones and how to address them. (15 marks)
  4. Discuss the environmental considerations when disassembling and repairing refrigerators in Kenya. (10 marks)
  5. Outline the components of an instant shower and explain the disassembly process for replacing the heating element. (13 marks)
The rest of this chapter
🔒

Create a free account to open more of this chapter.

Free: practical guides, quick cards, workplace scenarios and more.

Create a free account
🔒2.2 Sorting of screws during disassembling

In electronics engineering, especially within the Kenyan context where repair facilities often handle diverse makes and models of electrical and electronic appliances, proper sorting of screws during disassembly is essential. This practice prevents loss, damag…

🔒2.3 Inspecting and testing faulty equipment and appliances

Inspection and testing of faulty electrical and electronic equipment are fundamental skills for electronics engineers in Kenya. Accurate diagnosis not only saves time and resources but also ensures safety for users and technicians. Whether repairing diagnostic…

🔒2.4 Types of tests on power supply system

Testing power supply systems is a fundamental task for electronics engineers in Kenya, especially when maintaining or repairing electrical and electronic equipment. Proper testing ensures the reliability, safety, and efficiency of the power supply feeding devi…

🔒2.5 Troubleshooting methods on various equipment and appliances

Troubleshooting is a systematic approach to diagnosing and resolving faults in electrical and electronic equipment. For electronics engineers in Kenya, especially those working in hospitals, universities, or county government offices, effective troubleshooting…

🔒2.6 Safety during testing of power supply system

Testing power supply systems involves exposure to potentially hazardous voltages and currents. Electronics engineers in Kenya must prioritize safety to protect themselves and the equipment. This is particularly critical in environments such as hospitals and co…

🔒2.7 IEE Regulation

In the Kenyan context, adherence to the Institution of Electrical Engineers (IEE) regulations is critical for ensuring safety, reliability, and compliance in the repair and maintenance of electrical and electronic equipment. The IEE regulations provide a compr…

Chapter Summary

This chapter covered the systematic disassembly of various electrical and electronic equipment and appliances, including radios, televisions, refrigerators, and air conditioning systems, among others. It emphasized the importance of sorting screws properly during disassembly to avoid confusion and facilitate reassembly. The chapter detailed how to inspect and test faulty equipment to identify issues accurately. Different types of tests on power supply systems were explained, such as voltage input tests, short circuit tests, and open circuit tests, highlighting their role in diagnosing electrical faults. Troubleshooting methods tailored to various appliances were discussed to guide effective repair processes. Safety considerations during power supply testing were underscored to prevent accidents and equipment damage. Finally, the chapter introduced the IEE regulations that govern safe electrical practices and compliance requirements during inspection and testing activities.

Self-Assessment

🔒 PDFDownload this self-assessment, with answers

A. Written Assessment

  1. What is the correct procedure for disassembling a television to avoid damage to internal components? (3 marks)
  2. Identify three key safety precautions to observe when testing the power supply system of an electric kettle. (3 marks)
🔒20 more in this section.

Chapter Examination Questions

🔒 PDFDownload these examination questions, with worked answers

SECTION A (40 Marks) - Answer ALL Questions

  1. Explain the correct procedure for disassembling a radio to avoid damage to internal components. (4 marks)
  2. Describe how screws should be sorted and stored during the disassembly of a television set. (4 marks)
🔒18 more in this section.

Chapter Practical Activities

Practical 1: Disassemble and Sort Screws from a Radio

Electronics Engineering · Level 6
Electrical And Electronic Equipment And Appliance Repairs
PRACTICAL ASSESSMENT
TIME: 4 HOURS
⬇ PDFCandidate Instructions (Candidate Tool)

Type: Individual

INSTRUCTIONS TO CANDIDATE:
1.  You are required to perform the following task:
i.  Disassemble a radio measuring approximately 250mm x 150mm x 100mm and sort all screws by size and type into labeled containers.
2.  You have been provided with the following resources for the practical task:
Tools & EquipmentMaterials
ScrewdriversRadio (8 watts 3V DC IN, 1.5V x 2 dry cells)
Combination pliersDry cells 1.5V
Side cutterCables (red and black) 1 mm2
Multi-meterSoldering wire
Phase testerEquipment labels
Soldering gunPersonal Protective Equipment (dustcoat/overall, safety boots)
⬇ PDFResources Required (Cutting List)
S/NItemQuantity
1Radio (8 watts 3V DC IN, 1.5V x 2 dry cells)1 Pc per Candidate
2Dry cells 1.5V2 Pcs per Candidate
3Cables (red and black) 1 mm21 meter per Candidate
4Soldering gun1 Pc per 5 Candidates
5Soldering wire20 cm per Candidate
6Multi-meter1 Pc per Candidate
7Equipment labels5 Pcs per Candidate
8Phase tester1 Pc per 5 Candidates
9Combination pliers1 Pc per Candidate
10Side cutter1 Pc per Candidate
11Set of screwdrivers1 Set per Candidate
12Personal Protective Equipment (dustcoat/overall, safety boots)Enough per Candidate
⬇ PDFAssessor Guide
Items to be EvaluatedMarks AvailableMarks ObtainedComments
TASK 1: Disassemble and Sort Screws
Wore Personal Protective Equipment (dustcoat/overall and safety boots)
(Award 1 mark if worn correctly, otherwise 0)
1
Applied good housekeeping practice by ensuring clean working area before starting
(Award 1 mark if area was clean and organized, otherwise 0)
1
Identified and correctly used tools (screwdrivers, pliers, side cutter)
(Award 1 mark each for correct identification and safe use of tools)
2
Carefully disassembled the radio without damaging components
(Award marks based on care taken: 3 marks for no damage, 1-2 marks for minor damage, 0 for major damage)
3
Sorted screws into groups by size (length and diameter)
(Award marks for correct grouping: 3 marks for all screws sorted correctly, 1-2 marks for partial sorting)
3
Sorted screws by type (e.g., Phillips, flathead, self-tapping)
(Award marks for correct identification and sorting by type)
3
Labeled containers correctly with size and type
(Award marks for clear and correct labeling)
2
Maintained neatness and orderliness of sorted screws and workspace
(Award 1 mark for neat and organized work area after task)
1
Sub-Total16
PRODUCT CHECKLIST
All screws from the radio are disassembled and sorted accurately by size and type
(Award full marks if all screws are correctly sorted and accounted for)
5
Labels on containers match screw sizes and types correctly
(Award marks for clear, accurate labeling corresponding to sorted screws)
3
No damage to screws or radio components during disassembly
(Award full marks if no damage, partial marks if minor damage, zero if major damage)
3
Workspace is clean and tools are returned to appropriate places
(Award full marks if workspace is clean and tools are properly stored)
3
Sub-Total14
GRAND TOTAL30
ASSESSMENT OUTCOME:   ☐ Competent    ☐ Not Yet Competent (competent if at least 50%)

Practical 2: Disassemble and Inspect a Television Set 450mm x 350mm x 200mm

Electronics Engineering · Level 6
Electrical And Electronic Equipment And Appliance Repairs
PRACTICAL ASSESSMENT
TIME: 4 HOURS
⬇ PDFCandidate Instructions (Candidate Tool)

Type: Individual

INSTRUCTIONS TO CANDIDATE:
1.  You are required to perform the following task:
i.  Disassemble and inspect the internal components of a television set measuring approximately 450mm x 350mm x 200mm for faults and prepare a fault report.
2.  You have been provided with the following resources for the practical task:
Tools & EquipmentMaterials
MultimeterTelevision set 450mm x 350mm x 200mm
Screwdriver setPersonal Protective Equipment (Dust coat/Overall, Safety boots)
Pliers
Anti-static wrist strap
Cleaning brush
Magnifying glass
⬇ PDFResources Required (Cutting List)
S/NItemQuantity
1Television set 450mm x 350mm x 200mm1 Pc per Candidate
2Multimeter1 Pc per Candidate
3Screwdriver set1 Set per Candidate
4Pliers1 Pair per Candidate
5Anti-static wrist strap1 Pc per Candidate
6Cleaning brush1 Pc per Candidate
7Magnifying glass1 Pc per 5 Candidates
8Personal Protective Equipment (Dust coat/Overall, Safety boots)Enough per Candidate
⬇ PDFAssessor Guide
Items to be EvaluatedMarks AvailableMarks ObtainedComments
TASK 1: Disassembly and Inspection
Wore Personal Protective Equipment (Dust coat/Overall, Safety boots)
(Award 2 marks if PPE worn correctly, otherwise 0)
2
Ensured clean and safe working environment before starting work
(Award 2 marks if area is clean and safe, otherwise 0)
2
Identified and selected correct tools and equipment for disassembly
(Award 2 marks if tools correctly identified and used, otherwise 0)
2
Safely disconnected and removed the television casing using appropriate tools
(Award 4 marks for safe and correct removal, otherwise 0)
4
Applied anti-static precautions during component handling
(Award 2 marks if anti-static wrist strap used and precautions observed, otherwise 0)
2
Performed visual inspection of internal components for physical damage
(Award 3 marks if all major components inspected visually, otherwise 0)
3
Tested key components (capacitors, resistors, fuses) using multimeter and recorded results
(Award 5 marks if testing done correctly and results recorded, otherwise 0)
5
Cleaned internal components carefully using brush without damaging parts
(Award 2 marks if cleaning done carefully, otherwise 0)
2
Identified and documented any faults or damaged components found
(Award 3 marks if faults properly identified and documented, otherwise 0)
3
Sub-Total25
PRODUCT CHECKLIST
Television casing removed without damage and components intact
(Award 3 marks if casing removed intact and components undamaged, otherwise 0)
3
Multimeter readings recorded correctly for at least 3 components
(Award 3 marks if readings are correct and legible, otherwise 0)
3
Fault report clearly written with identified faults and recommendations
(Award 4 marks if report is clear, complete and legible, otherwise 0)
4
Sub-Total10
GRAND TOTAL35
ASSESSMENT OUTCOME:   ☐ Competent    ☐ Not Yet Competent (competent if at least 50%)
🔒

Free: practical guides, quick cards, workplace scenarios and more.

Create a free account
🔒Disassemble and test key components of a refrigerator 1800mm x 600mm x 600mmPractical 3
🔒Disassemble and Test an Electric Kettle Heating Element and SwitchesPractical 4
🔒Disassemble and Inspect an Instant Shower Unit 300mm x 200mm x 150mmPractical 5
🔒Disassemble and Inspect a Washing Machine Model WM-250 for Fault DiagnosisPractical 6
🔒Disassemble and Test a Mobile Phone Model XYZ123Practical 7
🔒Disassemble and Inspect an Iron Box Heating Element and ConnectionsPractical 8
🔒Disassemble and Test a Set Top Box for Fault DiagnosisPractical 9
🔒Perform voltage input test on a single-phase power supply systemPractical 10
🔒Perform Short Circuit Test on a Power Supply SystemPractical 11
🔒Perform open circuit test on a 230V single-phase power supply systemPractical 12
🔒Troubleshoot and repair faults in a 32-inch LED television setPractical 13
🔒Inspection and Testing of Electrical Equipment Applying IEE RegulationsPractical 14
Flashcards 20 cards Study deck ▾
Question
1

↻ Tap card to reveal answer
🔒

18 more in this section.

Create a free account
Test Yourself 18 questions Start quiz ▾
0%
0 / 2
🔒

16 more in this section.

Create a free account
Am I competent?

At the start of this chapter we promised you would be able to:

  • Safely disassemble electrical and electronic equipment and appliances using the manufacturer’s manuals.
  • Correctly sort screws according to standard operating procedures.

Tick each one you can genuinely do.

So, are you there yet?

You're competent when you can confidently do 50% or more of what this chapter promised.

Sign in to record how you're doing.