
By the end of this chapter, you will be able to:
These skills will help you work safely and professionally while also preparing you to take charge of your career, whether working for others or starting your own business.
Mounting conduit work pieces is a fundamental step in the installation of conduit systems, ensuring that electrical or communication cables are routed safely and efficiently. This process requires precise marking of mounting points and skillful bending of conduits to fit the designated spaces, especially in diverse workplaces such as hospitals, county government offices, and universities. Proper mounting not only safeguards the integrity of the conduit but also complies with safety standards and facilitates future maintenance or upgrades. Understanding these techniques is crucial for technicians working across various sectors where conduit systems support critical infrastructure.
Marking mounting points accurately is essential for a secure and professional conduit installation. In Kenyan institutions such as county referral hospitals or universities, improper marking can lead to misaligned conduit runs, resulting in safety hazards or costly rework. Clear marking ensures that conduits are fixed at the right locations, respecting structural elements and avoiding interference with existing installations. This section explores the principles, tools, techniques, and safety considerations involved in marking mounting points.
Marking mounting points involves defining exact locations where conduit supports, clamps, or brackets will be fixed. This step demands precision to guarantee alignment, stability, and compliance with installation standards.
Effective marking relies on appropriate tools that enhance precision and ease of use.
| Name | Specification | Use |
|---|---|---|
| Tape Measure | Steel tape, minimum 5 meters length | Measuring distances accurately on surfaces |
| Spirit Level | 24-inch length, bubble vial | Ensuring horizontal or vertical alignment |
| Chalk Line | String coated with chalk powder | Marking straight lines over long distances |
| Marker Pen | Permanent, fine tip | Making visible marks on various surfaces |
| Plumb Bob | Weighted string | Marking vertical reference points |
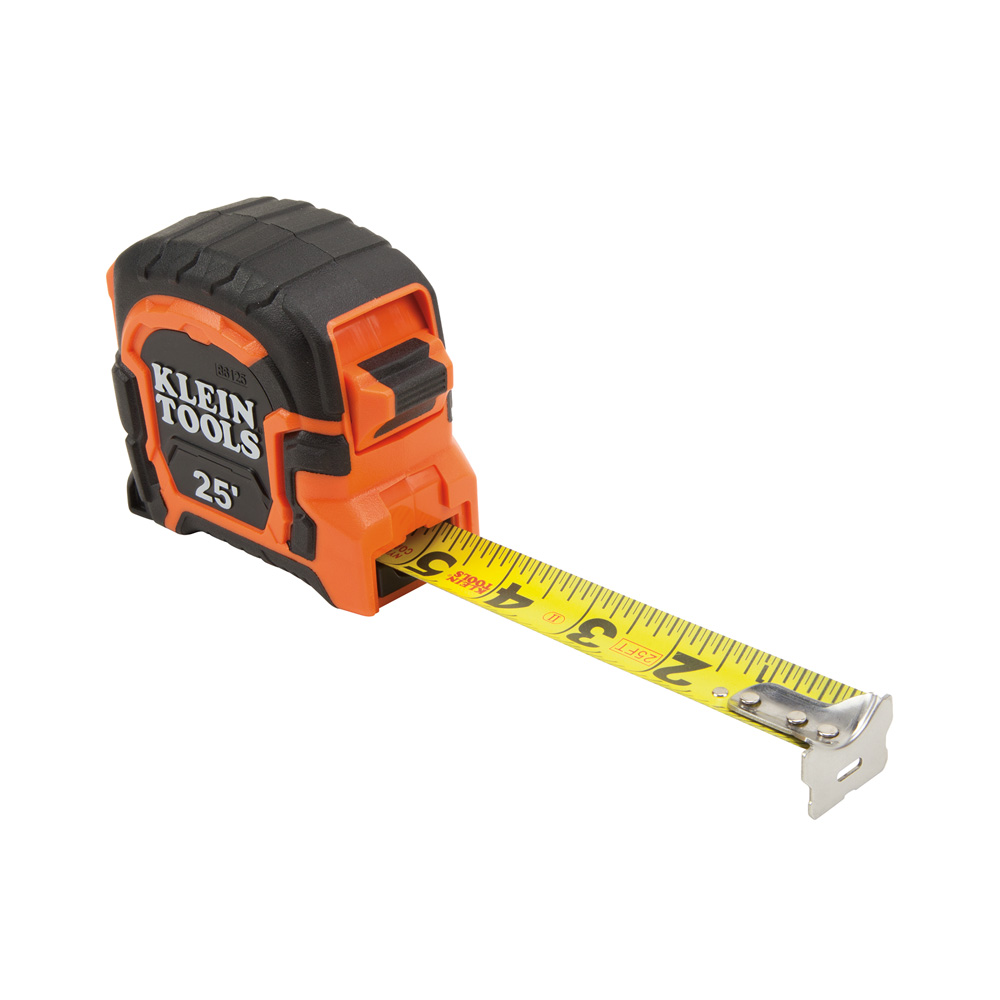
Tape measure with extended blade (Source: Wikipedia (Tape measure))
Spirit Level: Ensures marks are level or plumb, critical for neat conduit runs.
Chalk Line: Enables quick marking of straight lines, especially on large walls.
Marker Pen: Provides clear, durable markings that remain visible during installation.
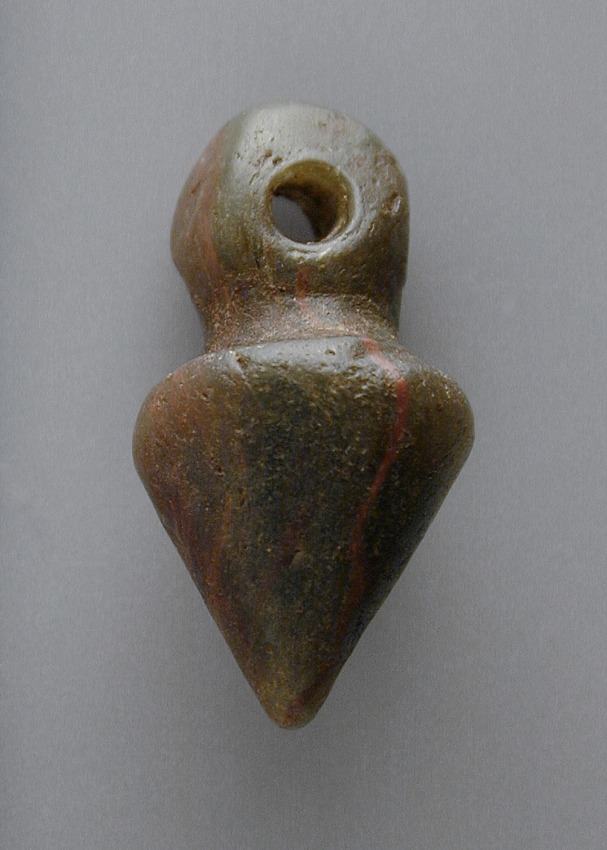
Traditional plumb bob used in building technology (Source: Wikimedia Commons)
In a retail business, technicians might use a chalk line to mark a straight conduit path along a long wall, ensuring cables run neatly behind display shelves.
The choice of marking technique depends on surface type, conduit route complexity, and accessibility.
Marking mounting points often involves working at heights or near live installations, requiring safety precautions.
Stable Working Platforms: Use ladders or scaffolds that comply with safety standards to reach high mounting points.
Clear Work Area: Remove obstacles to prevent trips or falls during marking.
At a county referral hospital, technicians must coordinate with the electrical department to de-energize circuits before marking mounting points near power outlets.
Create a free account to open more of this chapter.
Free: practical guides, quick cards, workplace scenarios and more.
Create a free accountThis chapter explored the essential steps involved in mounting conduit work pieces, starting with the precise marking of mounting points to ensure accurate and secure installation. It then examined the techniques for creating conduit bends, emphasizing the importance of correct shaping to maintain conduit integrity and facilitate smooth cable routing. The process of mounting conduit work pieces was detailed, highlighting methods to fasten conduits firmly while accommodating structural and safety requirements. The chapter concluded with a focus on housekeeping activities, stressing the need for maintaining general cleanliness at the worksite to promote safety and efficiency. Proper storage of tools and equipment was also discussed as a critical practice to preserve tool condition and streamline workflow. Together, these topics provide a comprehensive guide to effective conduit system installation.
Type: Individual
| Tools & Equipment | Materials |
|---|---|
| Measuring tape 5m | Conduit mounting clips |
| Carpenter’s pencil | Wall surface (smooth concrete panel) |
| Spirit level 600mm | |
| Combination square | |
| Marking gauge | |
| Masking tape roll |
| S/N | Item | Quantity |
|---|---|---|
| 1 | Measuring tape 5m | 1 Pc per Candidate |
| 2 | Carpenter’s pencil | 1 Pc per Candidate |
| 3 | Spirit level 600mm | 1 Pc per Candidate |
| 4 | Combination square | 1 Pc per Candidate |
| 5 | Marking gauge | 1 Pc per Candidate |
| 6 | Conduit mounting clips | 5 Pcs per Candidate |
| 7 | Wall surface (smooth concrete panel) | 1 Pc per Candidate |
| 8 | Masking tape roll | 1 Roll per 5 Candidates |
| 9 | Safety boots | 1 Pair per Candidate |
| 10 | Dust coat/overall | 1 Pc per Candidate |
| Items to be Evaluated | Marks Available | Marks Obtained | Comments |
|---|---|---|---|
| TASK 1: Marking Mounting Points | |||
| Wore personal protective equipment (safety boots and dust coat) (Award 2 or 0) | 2 | ||
| Selected and handled measuring and marking tools correctly (Award 2 or 0) | 2 | ||
| Measured and marked mounting points according to layout drawing within ±2mm accuracy (Award 1 mark for each correctly marked mounting point, total 5 marks) | 5 | ||
| Used spirit level and combination square to ensure horizontal and vertical alignment (Award 3 or 0) | 3 | ||
| Marked uniform spacing of mounting points at 300mm intervals as per specification (Award 3 or 0) | 3 | ||
| Maintained clean and organized work area throughout the task (Award 2 or 0) | 2 | ||
| Sub-Total | 17 | ||
| PRODUCT CHECKLIST | |||
| Mounting points marked correctly on wall surface with ±2mm tolerance on 1200mm x 900mm area (Award 5 or 0) | 5 | ||
| Mounting points aligned horizontally and vertically as per layout drawing (Award 4 or 0) | 4 | ||
| Uniform spacing of mounting points at 300mm centres observed (Award 4 or 0) | 4 | ||
| Sub-Total | 13 | ||
| GRAND TOTAL | 30 | ||
Type: Individual
| Tools & Equipment | Materials |
|---|---|
| Conduit Bender (16mm capacity) | 16mm Electrical Conduit Pipe |
| Measuring Tape | Safety Gloves |
| Permanent Marker | Safety Boots |
| Spirit Level | Eye Protection Goggles |
| Work Apron |
| S/N | Item | Quantity |
|---|---|---|
| 1 | 16mm Electrical Conduit Pipe | 2 meters per Candidate |
| 2 | Conduit Bender (16mm capacity) | 1 per Candidate |
| 3 | Measuring Tape | 1 per Candidate |
| 4 | Permanent Marker | 1 per Candidate |
| 5 | Spirit Level | 1 per Candidate |
| 6 | Safety Gloves | 1 pair per Candidate |
| 7 | Safety Boots | 1 pair per Candidate |
| 8 | Eye Protection Goggles | 1 per Candidate |
| 9 | Work Apron | 1 per Candidate |
| Items to be Evaluated | Marks Available | Marks Obtained | Comments |
|---|---|---|---|
| TASK 1: Forming Standard Conduit Bends | |||
| Wore personal protective equipment (safety boots, gloves, goggles, apron) (Award 2 or 0) | 2 | ||
| Measured and marked conduit accurately to within ±2mm (Award 3 or 0) | 3 | ||
| Selected and used appropriate conduit bending tools correctly (Award 3 or 0) | 3 | ||
| Formed a neat and smooth 90° bend without kinks (Award 4 or 0) | 4 | ||
| Formed a neat and smooth 45° bend without kinks (Award 4 or 0) | 4 | ||
| Ensured bends are aligned and plumb using spirit level (Award 2 or 0) | 2 | ||
| Performed good housekeeping by cleaning workspace and disposing waste (Award 2 or 0) | 2 | ||
| Sub-Total | 20 | ||
| PRODUCT CHECKLIST | |||
| Conduit bends formed to correct angles (90° and 45°) with ±2° tolerance (Award 5 or 0) | 5 | ||
| Bends are smooth, free from cracks, dents or flattening (Award 4 or 0) | 4 | ||
| Length of conduit before and after bending matches drawing within ±2mm (Award 3 or 0) | 3 | ||
| Sub-Total | 12 | ||
| GRAND TOTAL | 32 | ||
At the start of this chapter we promised you would be able to:
Tick each one you can genuinely do.
So, are you there yet?
You're competent when you can confidently do 50% or more of what this chapter promised.
Sign in to record how you're doing.